Installing Onvocado on your website using Google Tag Manager
A Comprehensive Guide to Integrating Onvocado Pixel Script with Google Tag Manager
- Written by Onvocado Staff |
- February 05, 2025
Do you want to effortlessly enhance engagement on your website? Onvocado allows you to interact with visitors, collect invaluable data, and improve user experience—all without coding skills. By using Google Tag Manager (GTM), you can streamline the installation and management process of Onvocado's pixel script.
Why Onvocado is Beneficial:
Effortless Engagement: Onvocado boosts visitor interactions and data collection with customizable options, ideal for audience segmentation and reducing cart abandonment rates.
Data-Driven Insights: The tool stores vital interaction data, enabling detailed analysis and refined future marketing strategies.
Customizable Forms: Design visually appealing forms that integrate seamlessly with your site's design, aiding customer retention and data gathering.
User-Friendly Campaign Builder: Onvocado’s intuitive tools allow you to easily define your campaign’s characteristics.
Platform Agnostic: Onvocado works on any web platform. Easily deploy it using Google Tag Manager.
In this Guide, You’ll Learn:
- How to create and set up a new tag in Google Tag Manager
- How to add and configure the Onvocado pixel script
- Additional tips for maximizing the benefits of this integration
Step-by-Step Instructions:
Create and Set Up a New Tag in Google Tag Manager
Access Google Tag Manager: Log in to your Google Tag Manager account. If you don’t have an account, you’ll need to create one.
Create a New Tag: In the GTM dashboard, click on “Tags” in the left-hand menu and then select “New”.
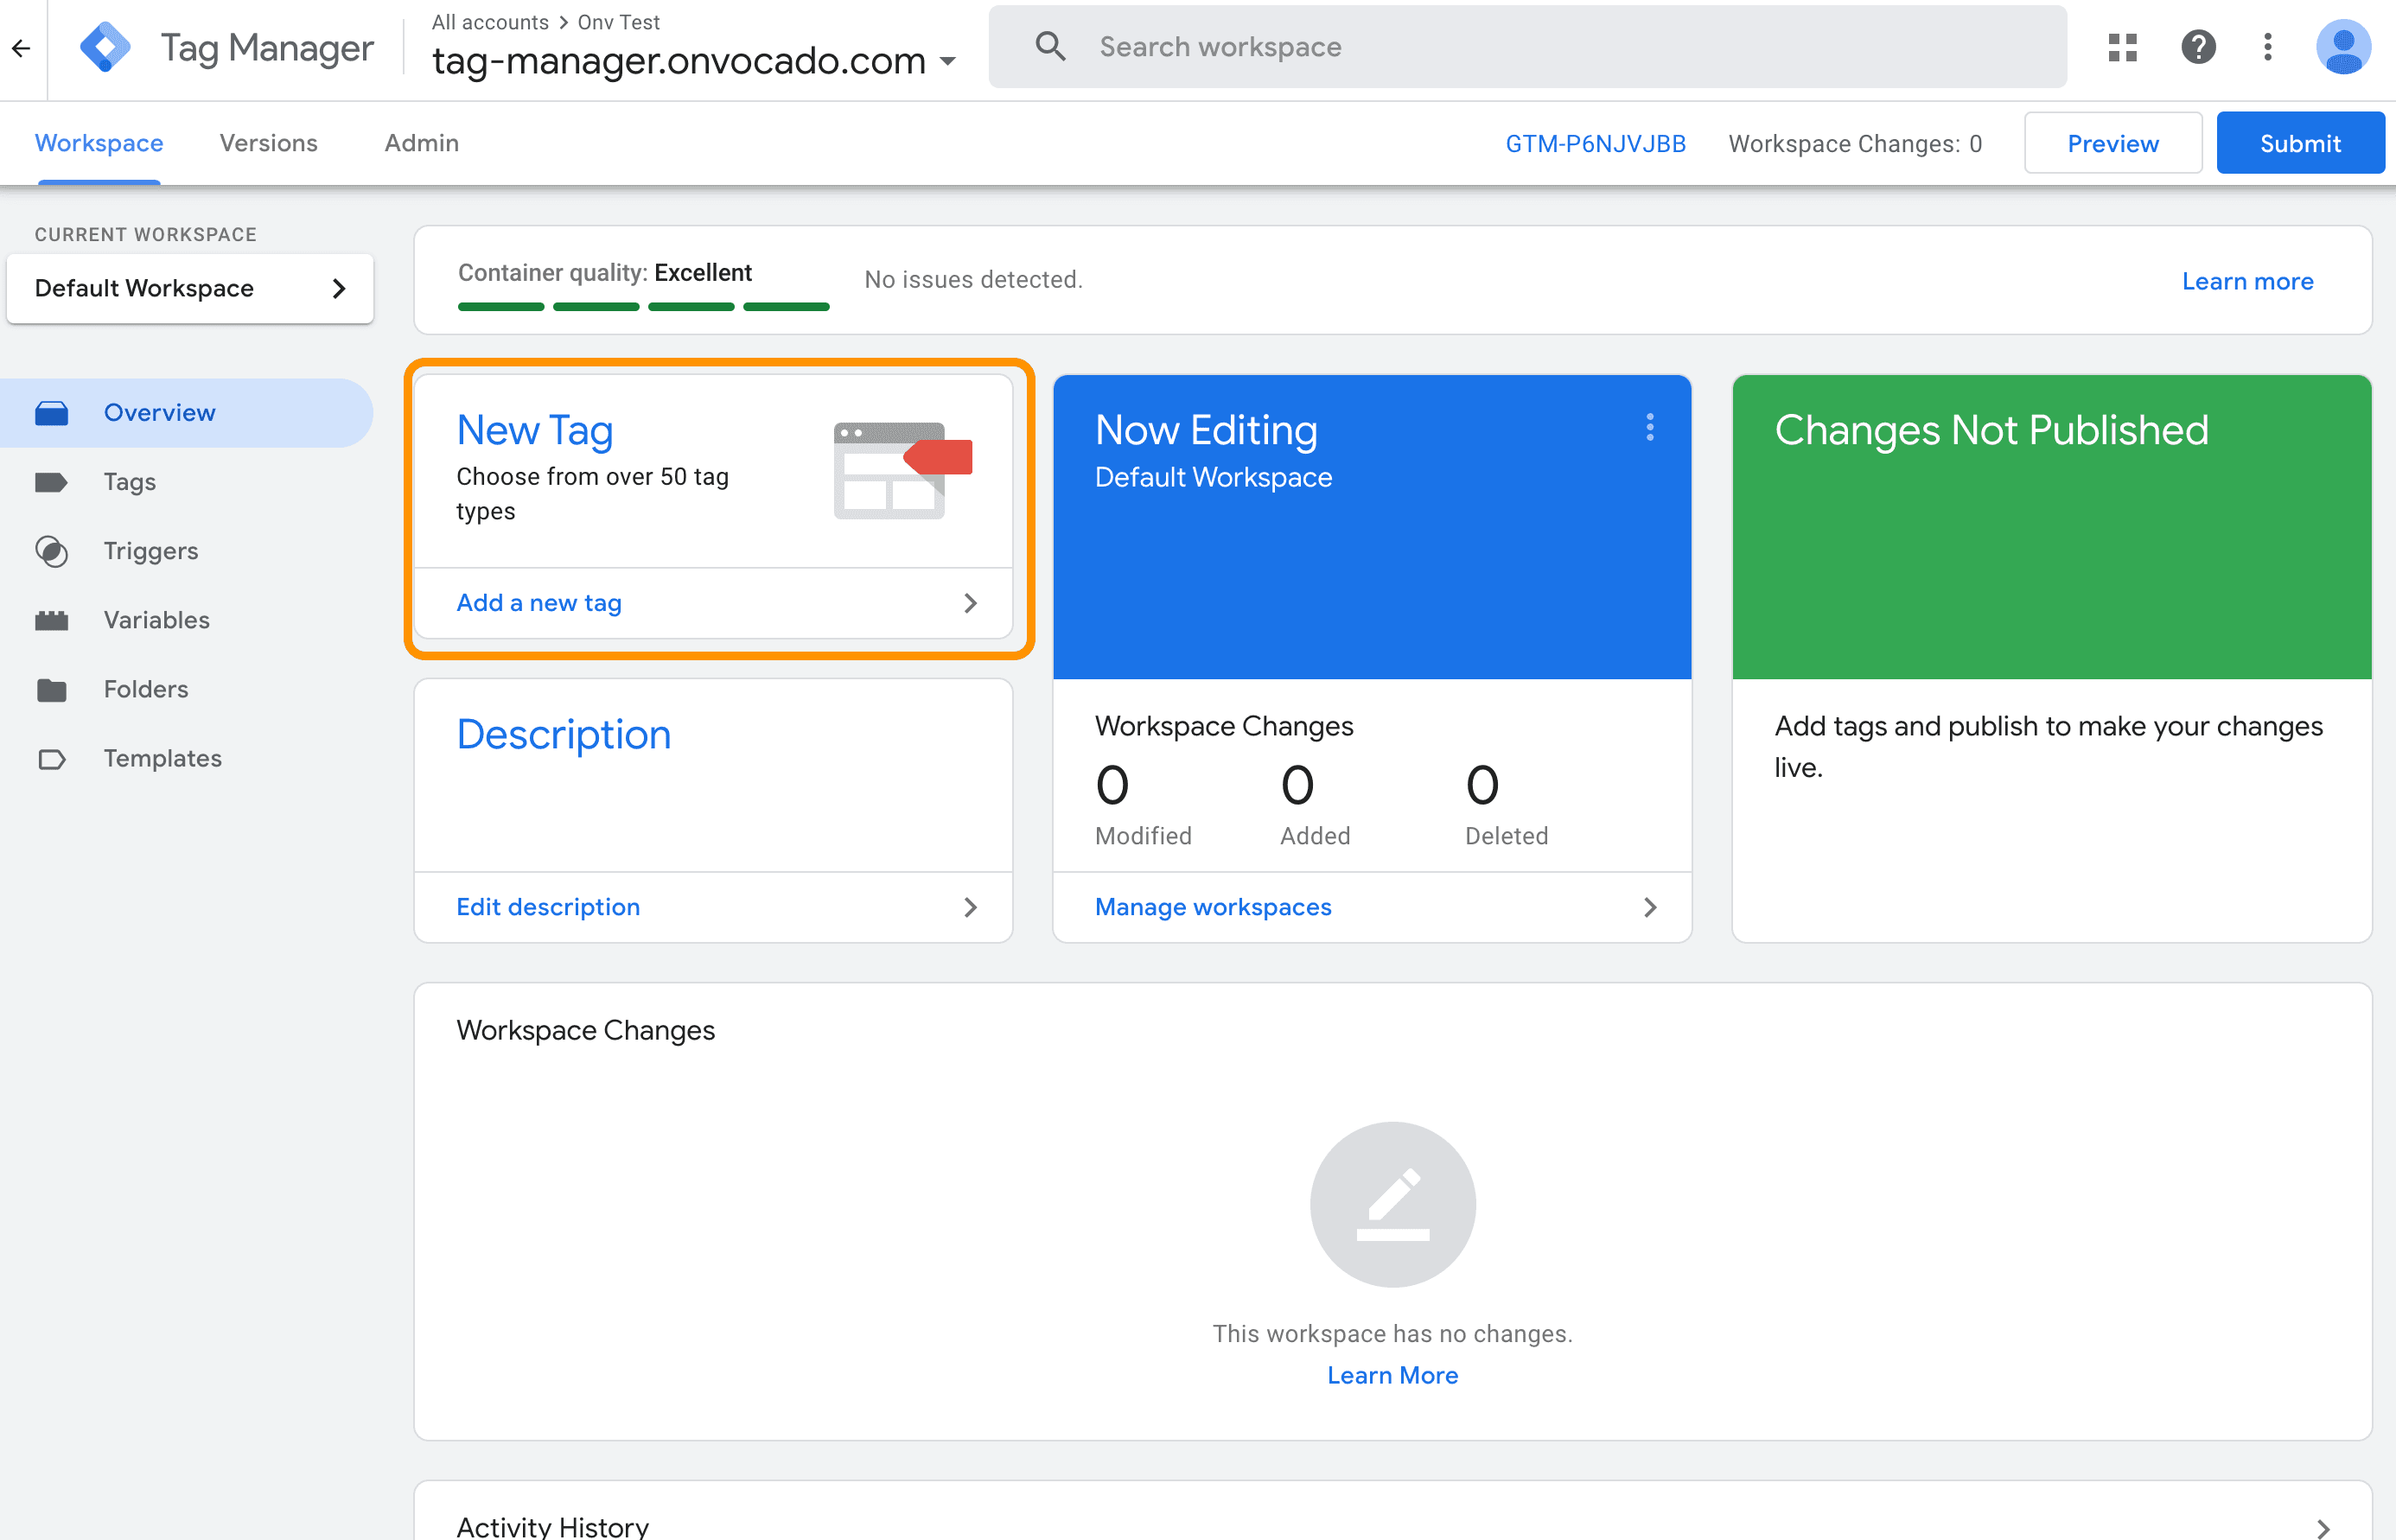
Configure Tag:
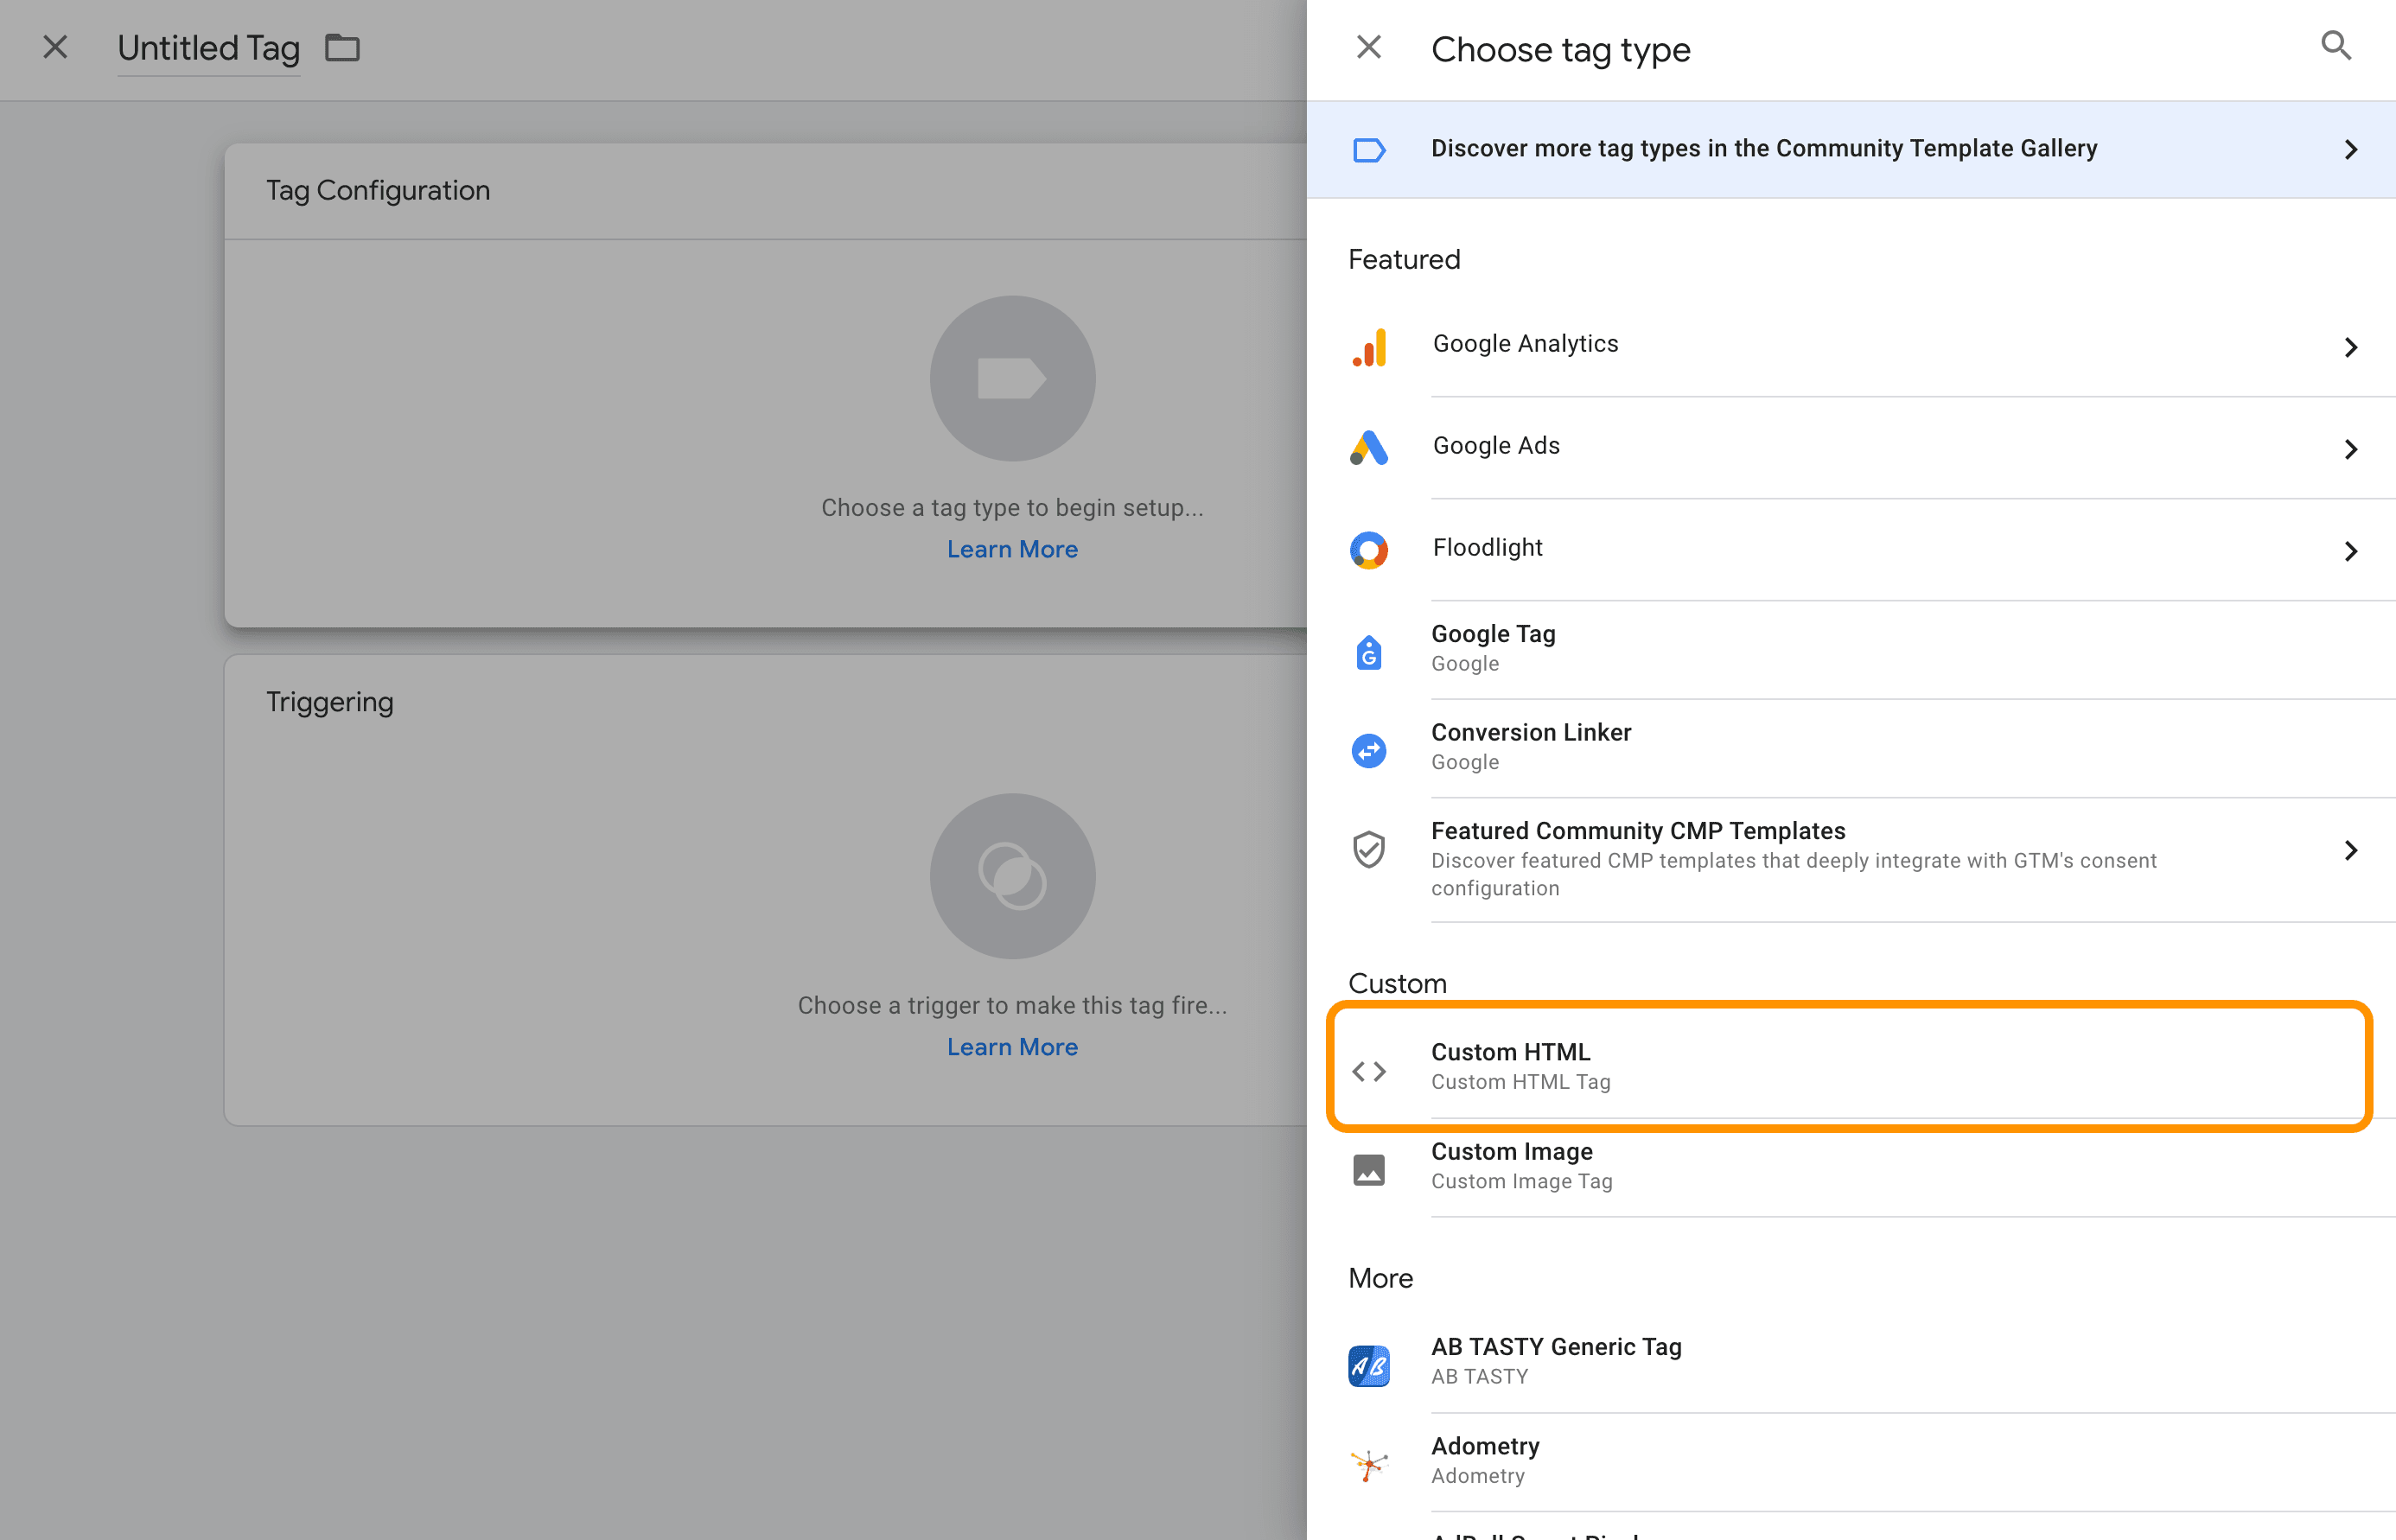
- Click on “Tag Configuration” to choose a tag type.
- Select “Custom HTML” as the tag type.
Add and Configure the Onvocado Pixel Script
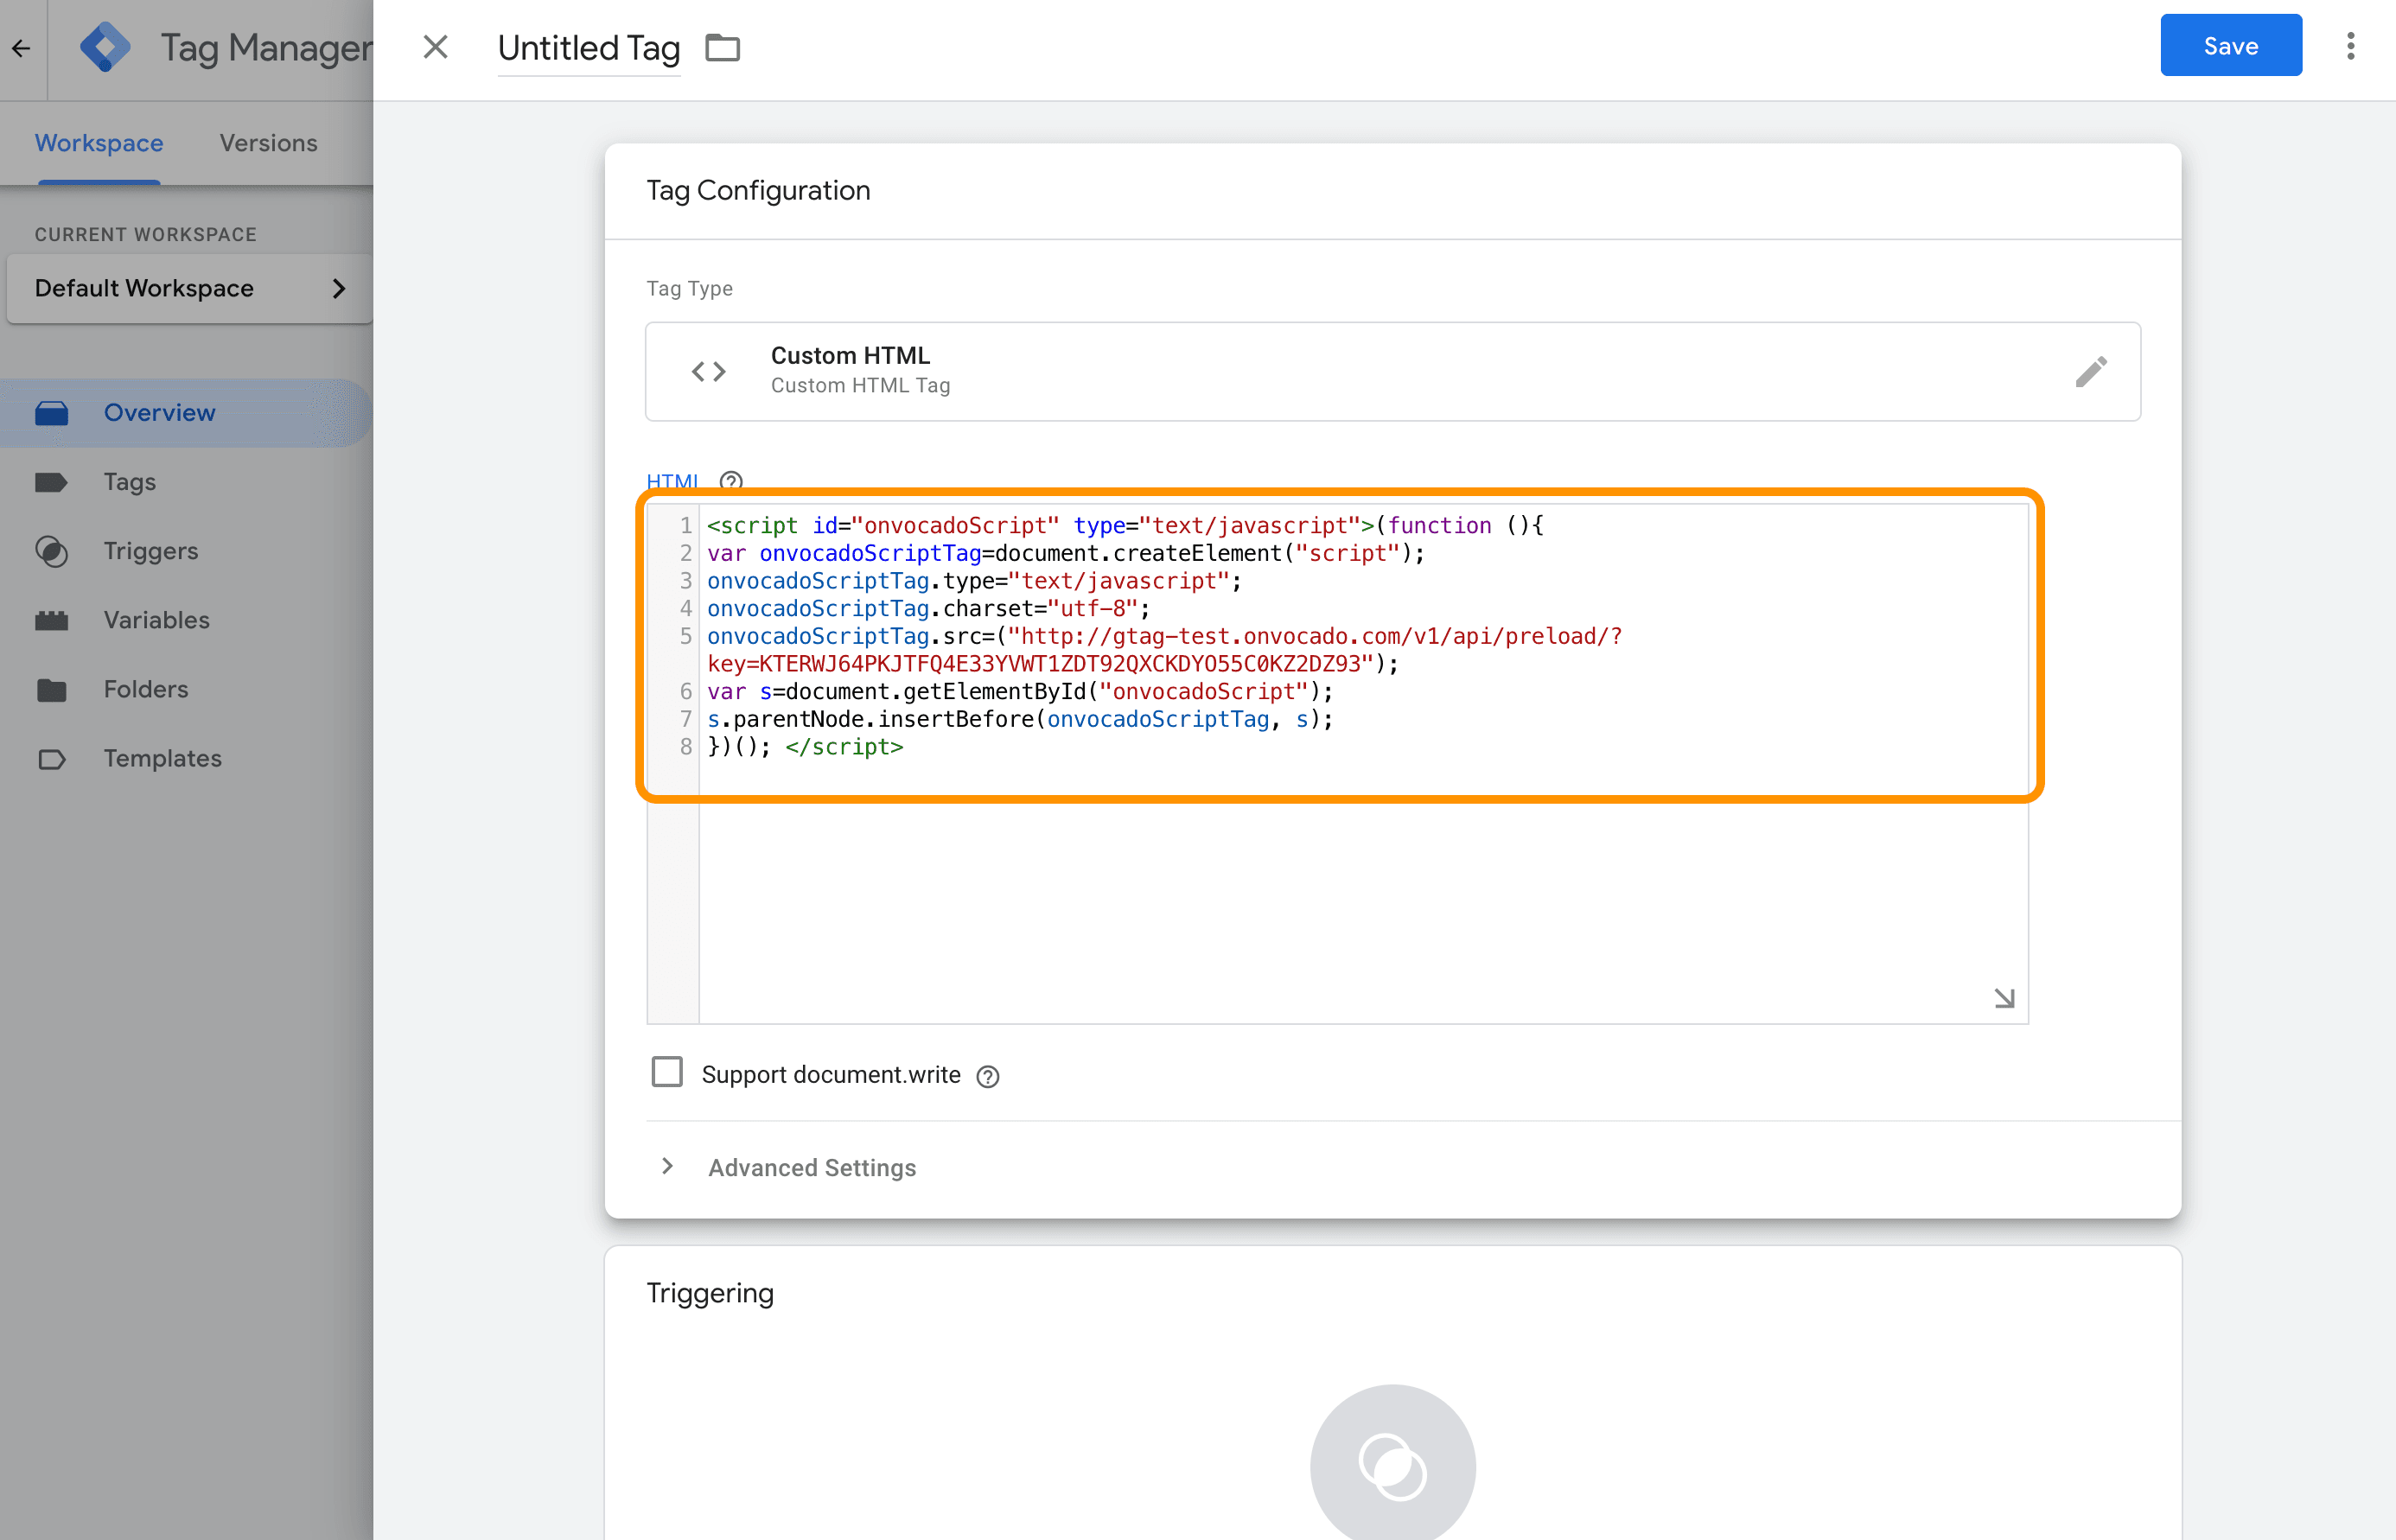
Add Onvocado Script:
- In your Onvocado account, navigate to the "Embed" section and copy the provided pixel script.
- Paste this script into the HTML field in the GTM tag configuration.
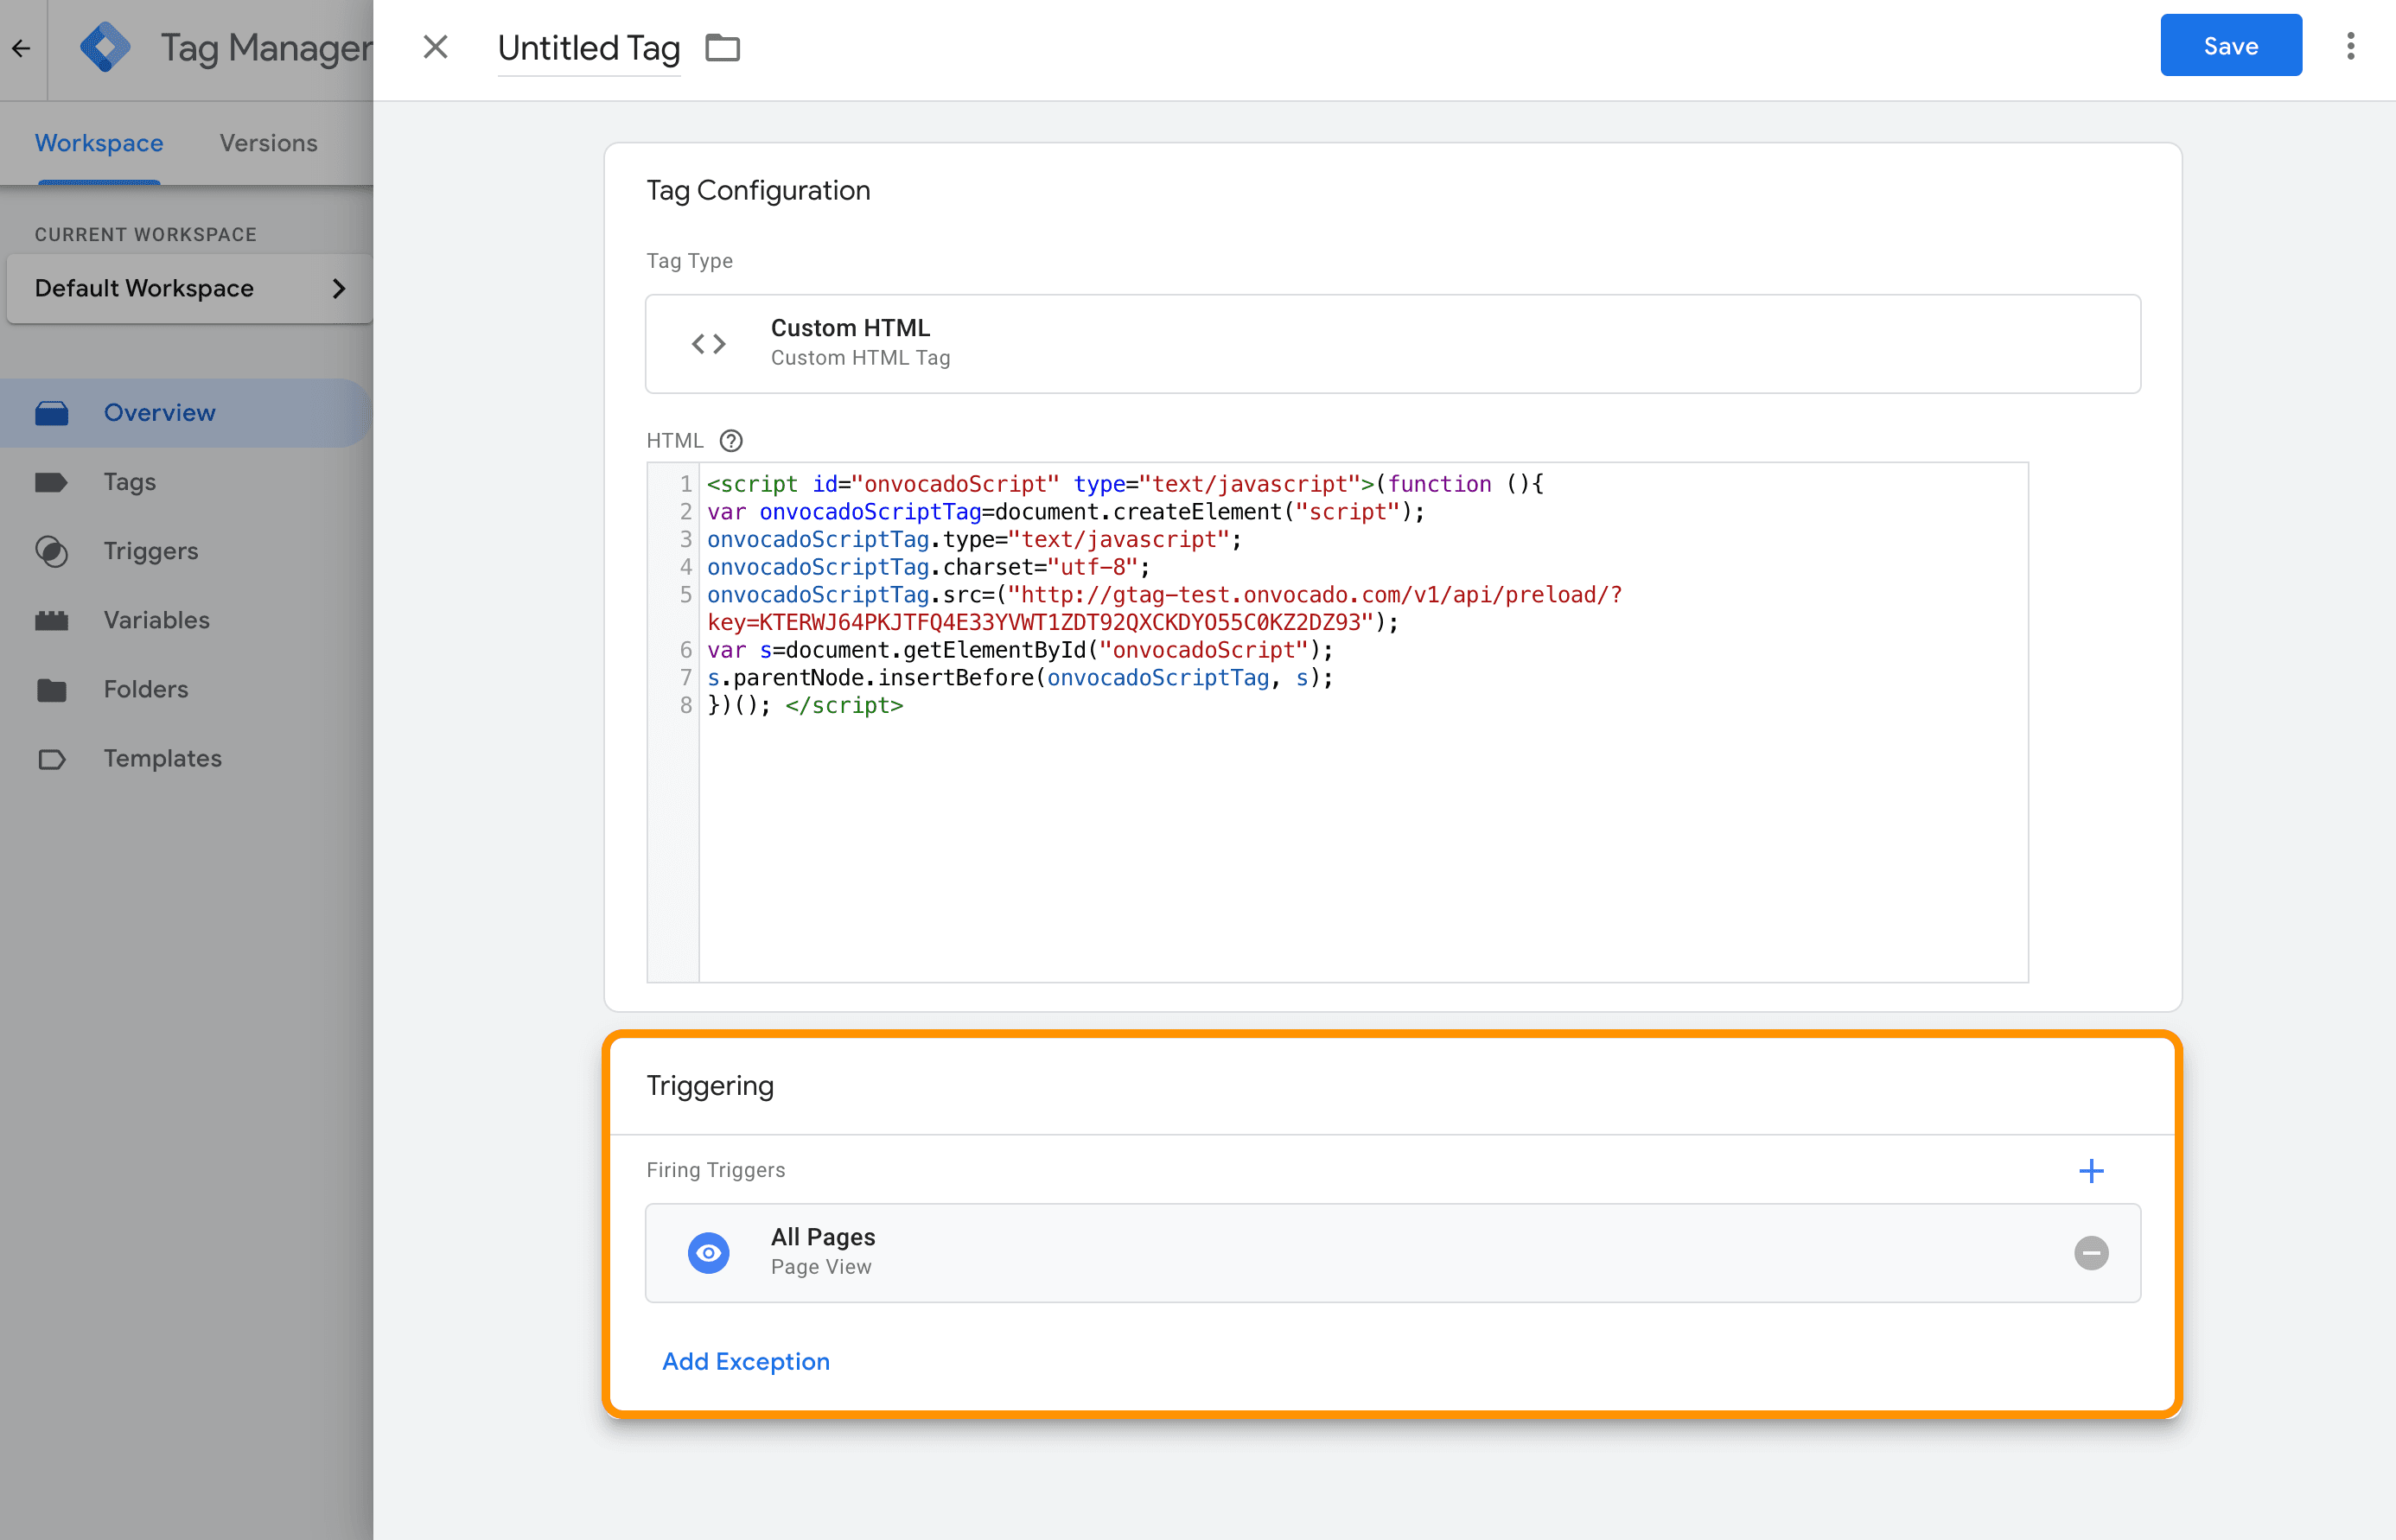
Set Up Trigger:
- Click on “Triggering” and select “All Pages” if you want the pixel to fire on every page. You can customize this according to your specific needs.
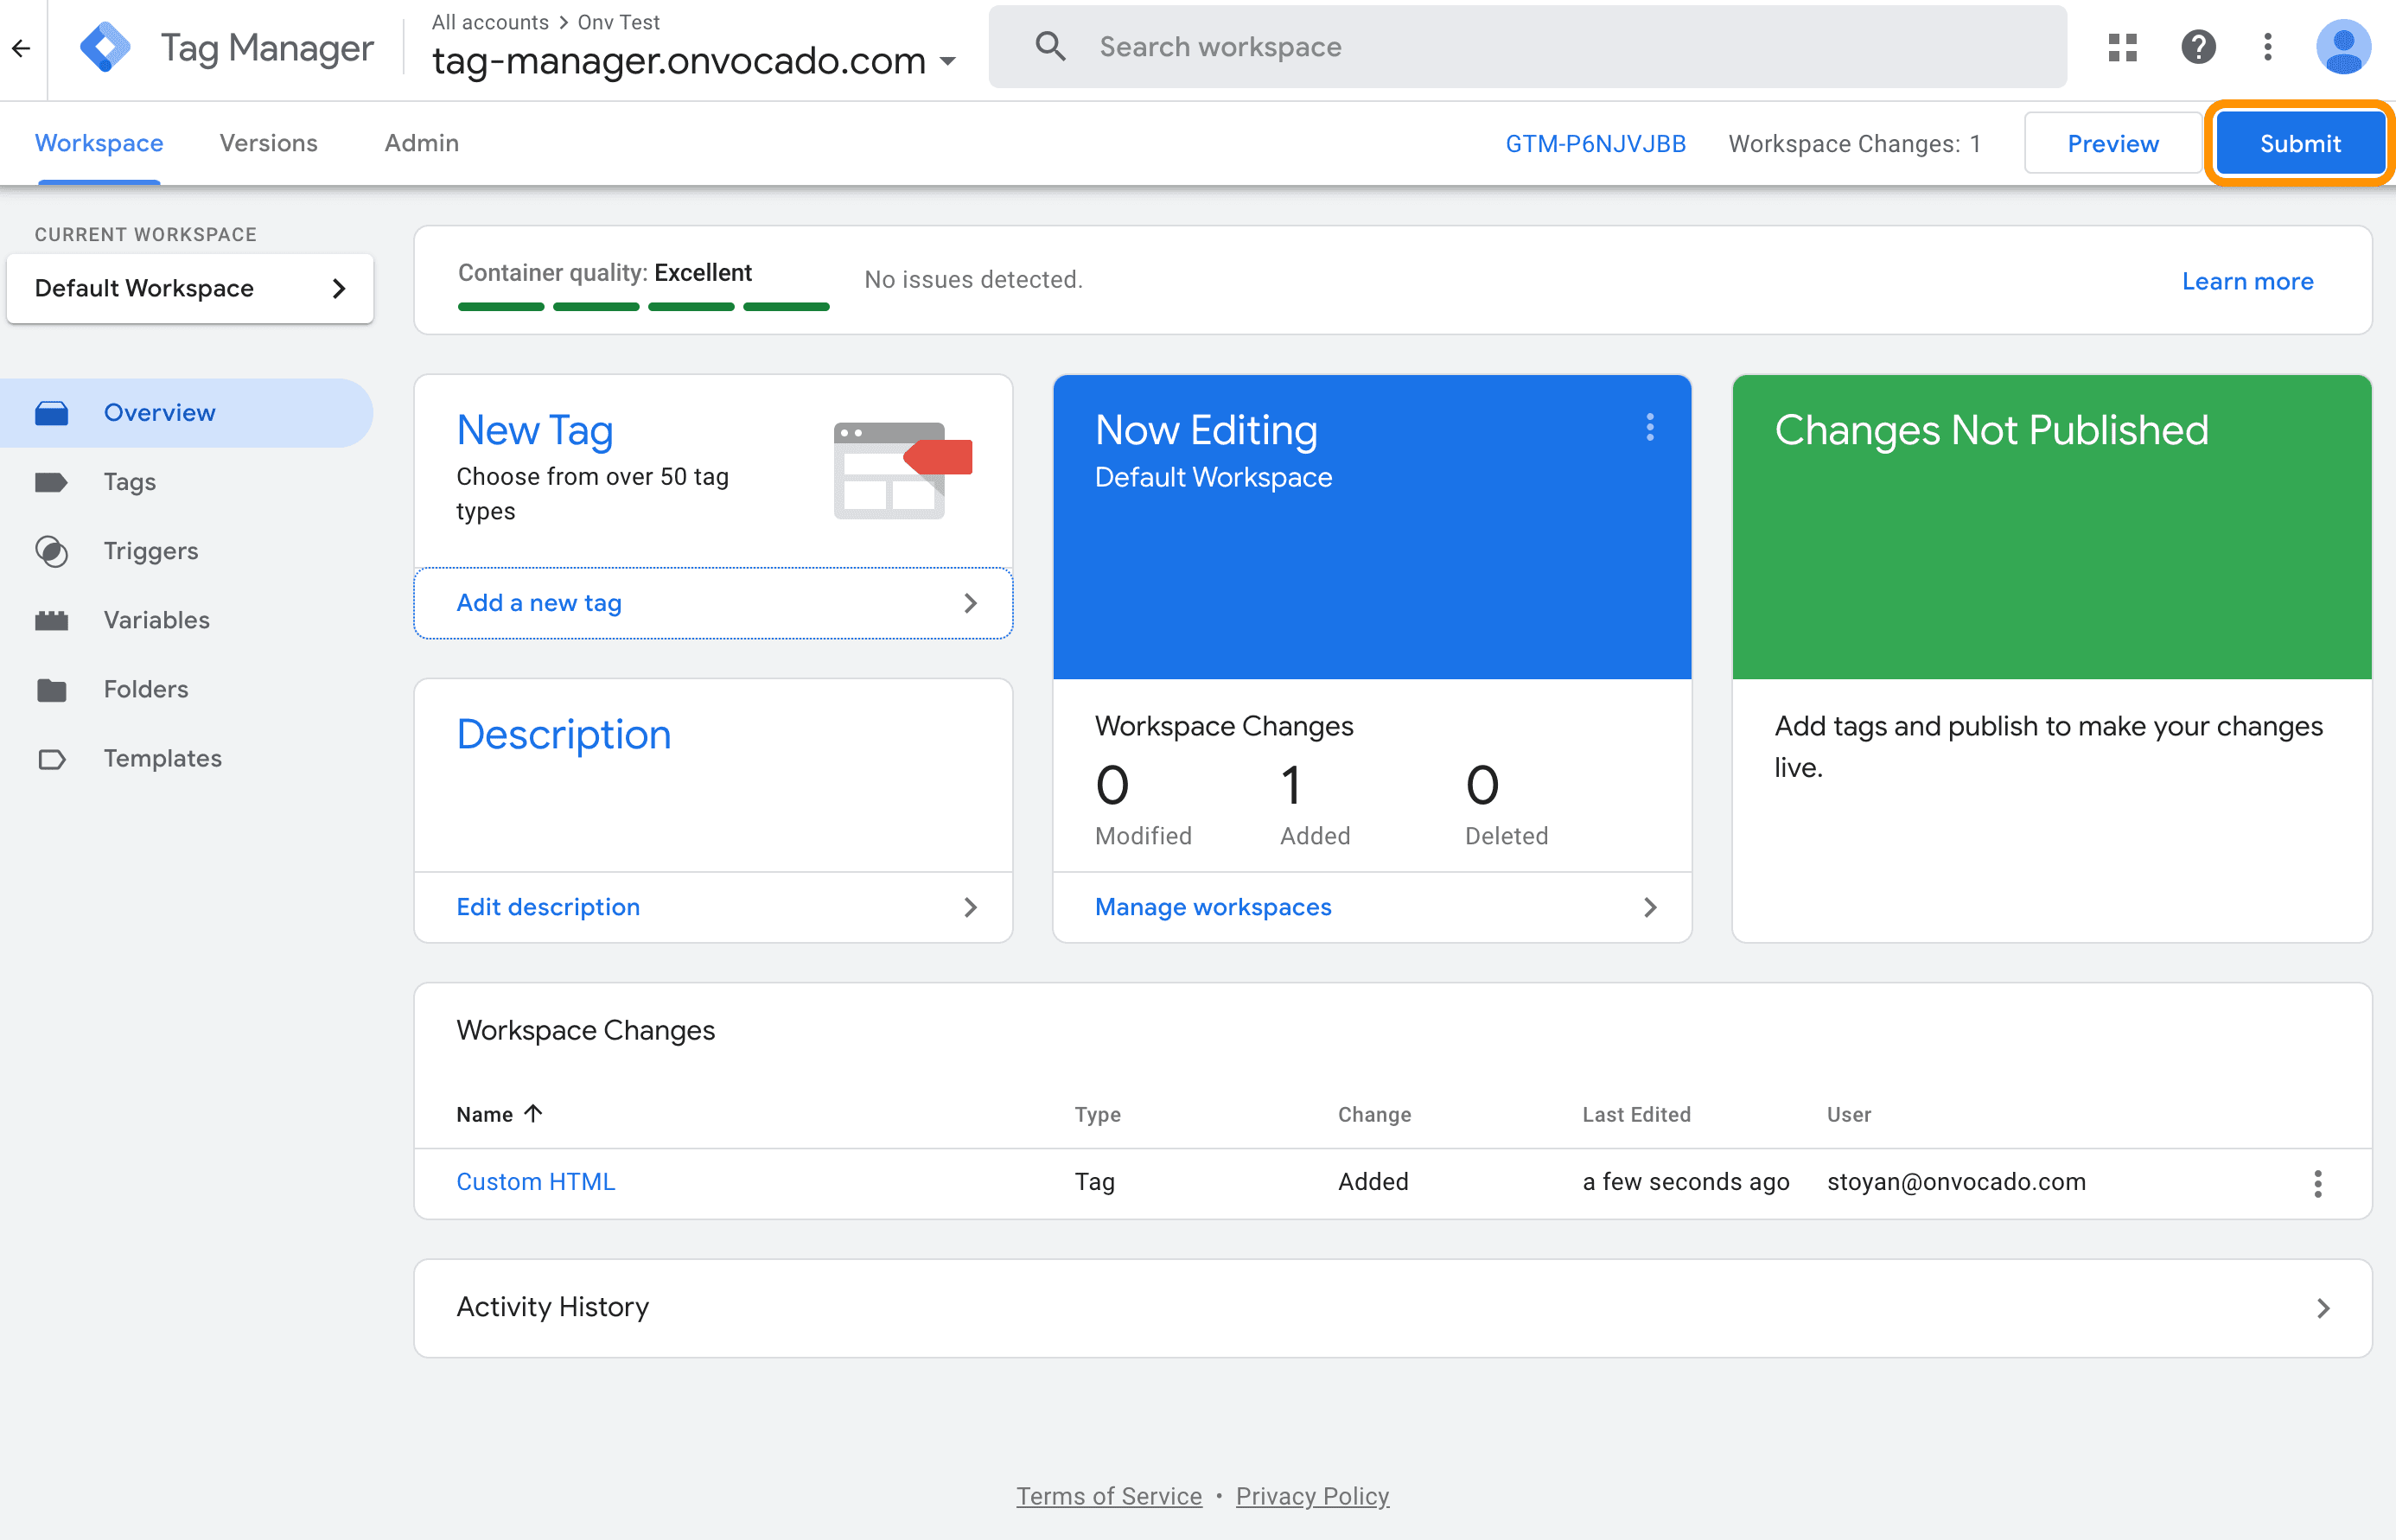
Save and Publish:
- After configuring the tag and setting the trigger, click “Save”.
- Click “Submit” in the top-right corner of the GTM dashboard, then “Publish” to deploy the changes.
Additional Tips for Optimal Integration
Verify Installation: Use Google Tag Assistant or another tag verification tool to ensure your Onvocado pixel is firing correctly.
Wrap-Up
By following these steps, you can effectively integrate the Onvocado pixel script with Google Tag Manager, enhancing your website’s functionality and user experience. Keep your tools updated and refer to official documentation for any advanced needs. This seamless integration will provide valuable insights and improve visitor engagement on your site.
Feel free to reach out if you have any questions or need further assistance with the integration process. Happy tagging!