How to Automate Your Workflow: Integrating Onvocado with Zapier
Simplify your lead management and marketing tasks by seamlessly connecting Onvocado with over 3,000 apps through Zapier.
- Written by Onvocado Staff |
- February 04, 2025
Setting up Zapier integration in Onvocado
Step 1: Select widget to integrate with Zapier
Log into your Onvocado account, go to the "Publish" settings of your campaign. There, under "Integrations" you'll find Zapier.
- Click "Add Zapier Webhook"
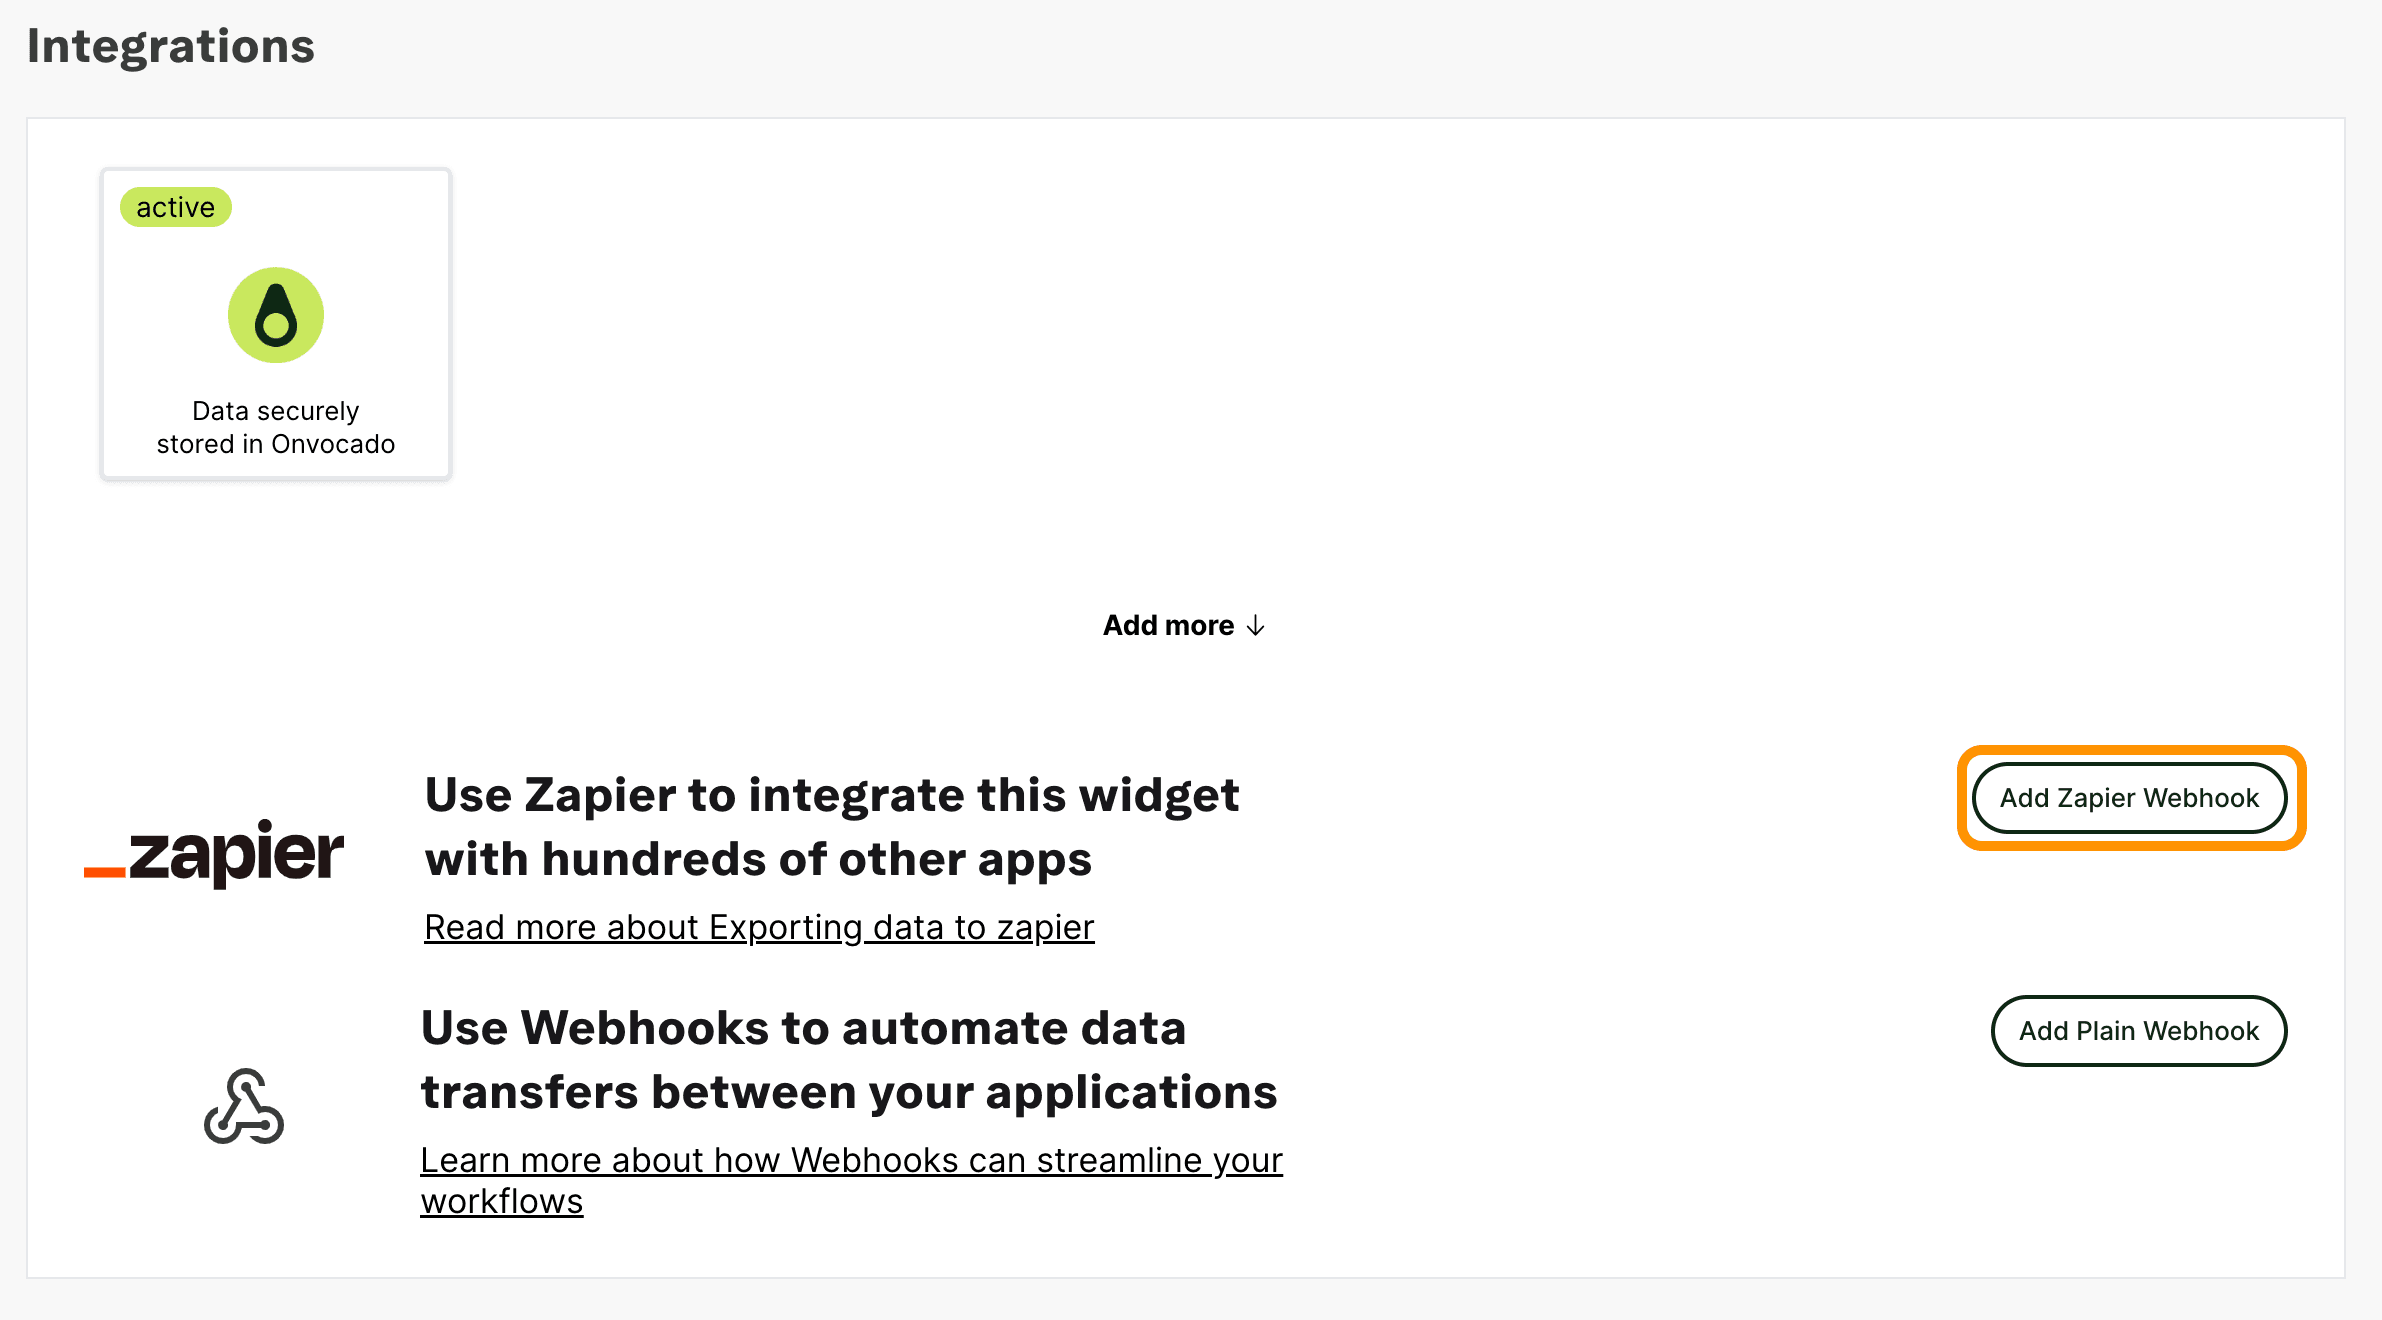
- Add the name of your integration
- Click "Open Zapier" to set up your integration in Zapier.
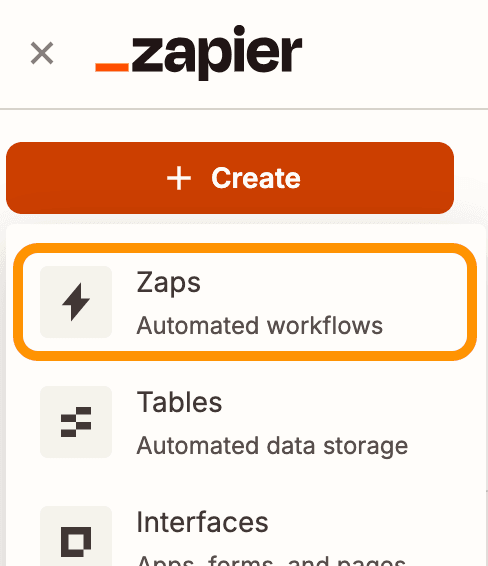
Step 2: Create a Zap
In Zapier, set up a new Zap. Choose Onvocado as the trigger and specify an event, such as “New Form Submission”.
- In your Zapier Dashboard, click "Create" in the left panel and select "Zaps"
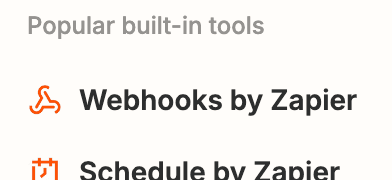
- Click on "Trigger" and select "Webhooks by Zapier" from the options, click "Continue"
- Click the dropdown list and select the Catch Hook trigger event, then click Continue.
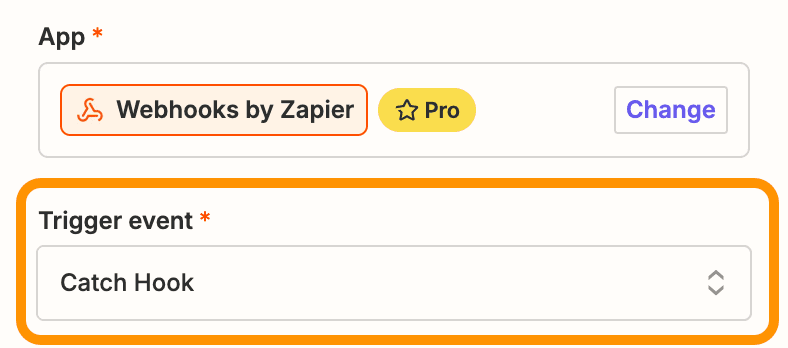
- Leave out the "Pick off a Child Key" option blank and click "Continue"
- Copy the webhook URL
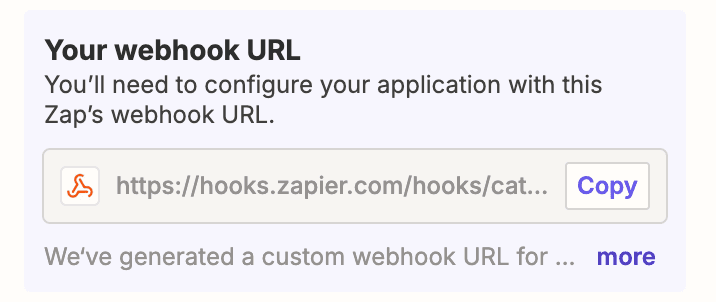
- Go Back to Onvocado
Step 3: Connect Onvocado to Zapier
- Paste the URL copied from Zapier in the Webhook URL field.
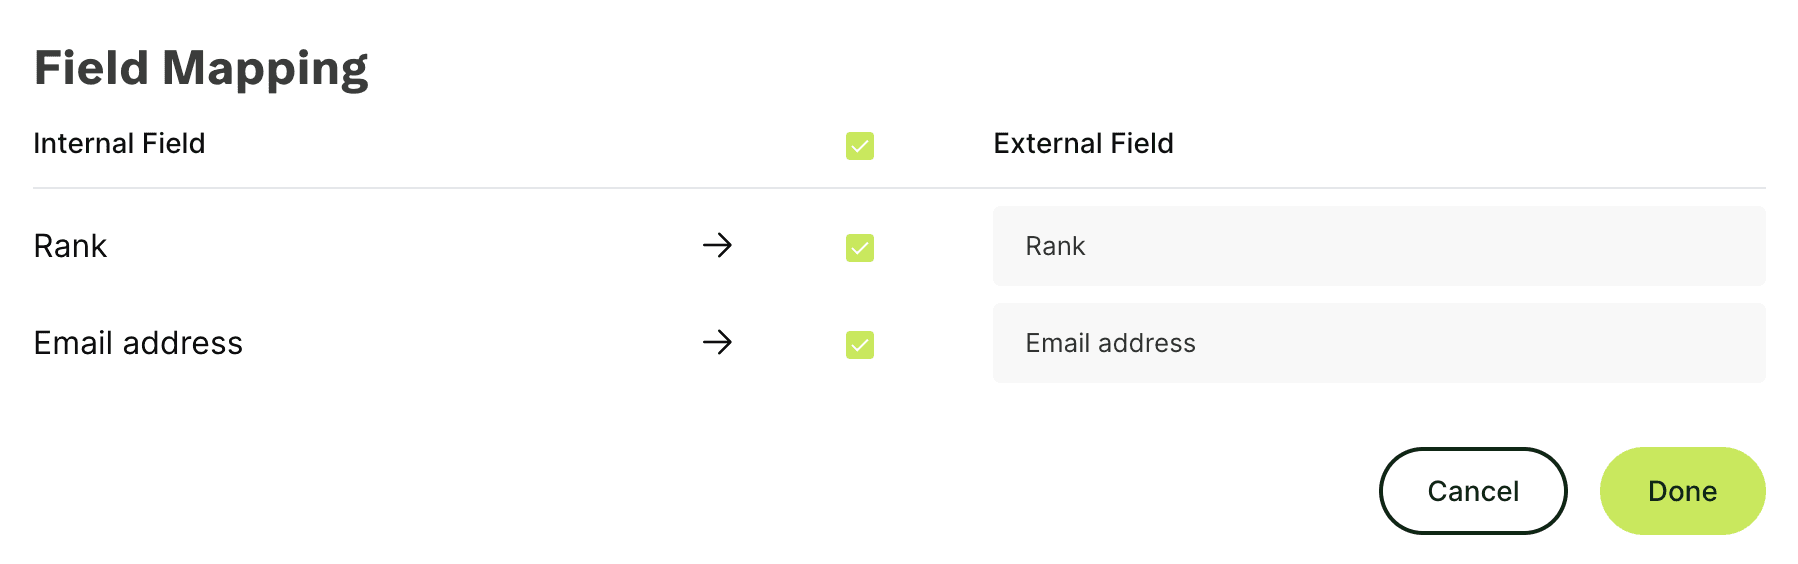
- In the Field Mapping section, you can select which fields to send from Onvocado to Zapier. You can also modify the field names before sending.
Testing Zapier webhooks
When your Onvocado widget is connected to a Zapier webhook URL, it automatically sends data to Zapier each time a field is completed.
To test the webhook trigger:
- Interact with the widget on your site to send a request to the Zapier webhook URL.
- In Zapier, click "Test Trigger". If the data has been successfully sent to the webhook, Zapier will confirm that it has been received.
Note:
If Zapier does not receive the data, double-check the webhook settings in Onvocado to ensure the correct Zapier webhook URL has been added.
For more details, refer to the Zapier webhook documentation.