Integrate Onvocado with SendFox: A Step-by-Step Guide
Supercharge your marketing efforts by connecting Onvocado with SendFox. This integration enables seamless customer data synchronization, automated email campaigns, and the power of SendFox's advanced marketing tools within Onvocado.
- Written by Onvocado Staff |
- February 04, 2025
Before diving into the Onvocado and SendFox integration steps, let’s explore why connecting these two powerful platforms can transform your business:
Automated Workflows for Efficiency
Streamline your marketing and sales processes by automating repetitive tasks. With the Onvocado-SendFox integration, you can set up automated workflows that save time and reduce manual effort, enabling your team to focus on strategic initiatives.
Enhanced Customer Segmentation
Harness SendFox’s robust segmentation features to target your audience more effectively. By integrating with Onvocado, you can access detailed customer data that allows for precise segmentation and more personalized marketing strategies.
Improved Communication Strategies
Deliver personalized email campaigns tailored to customer behavior and preferences. The Onvocado-SendFox integration enables you to analyze customer interactions, ensuring your communications resonate with your audience and drive higher engagement rates.
Prerequisites
Before You Begin, Ensure You Have the Following:
Active Accounts:
- An active Onvocado account.
- An active SendFox account.
API Credentials:
- Your SendFox Personal Access Token.
To find your Personal Access Token, go to the SendFox "Settings" > "API" menu:
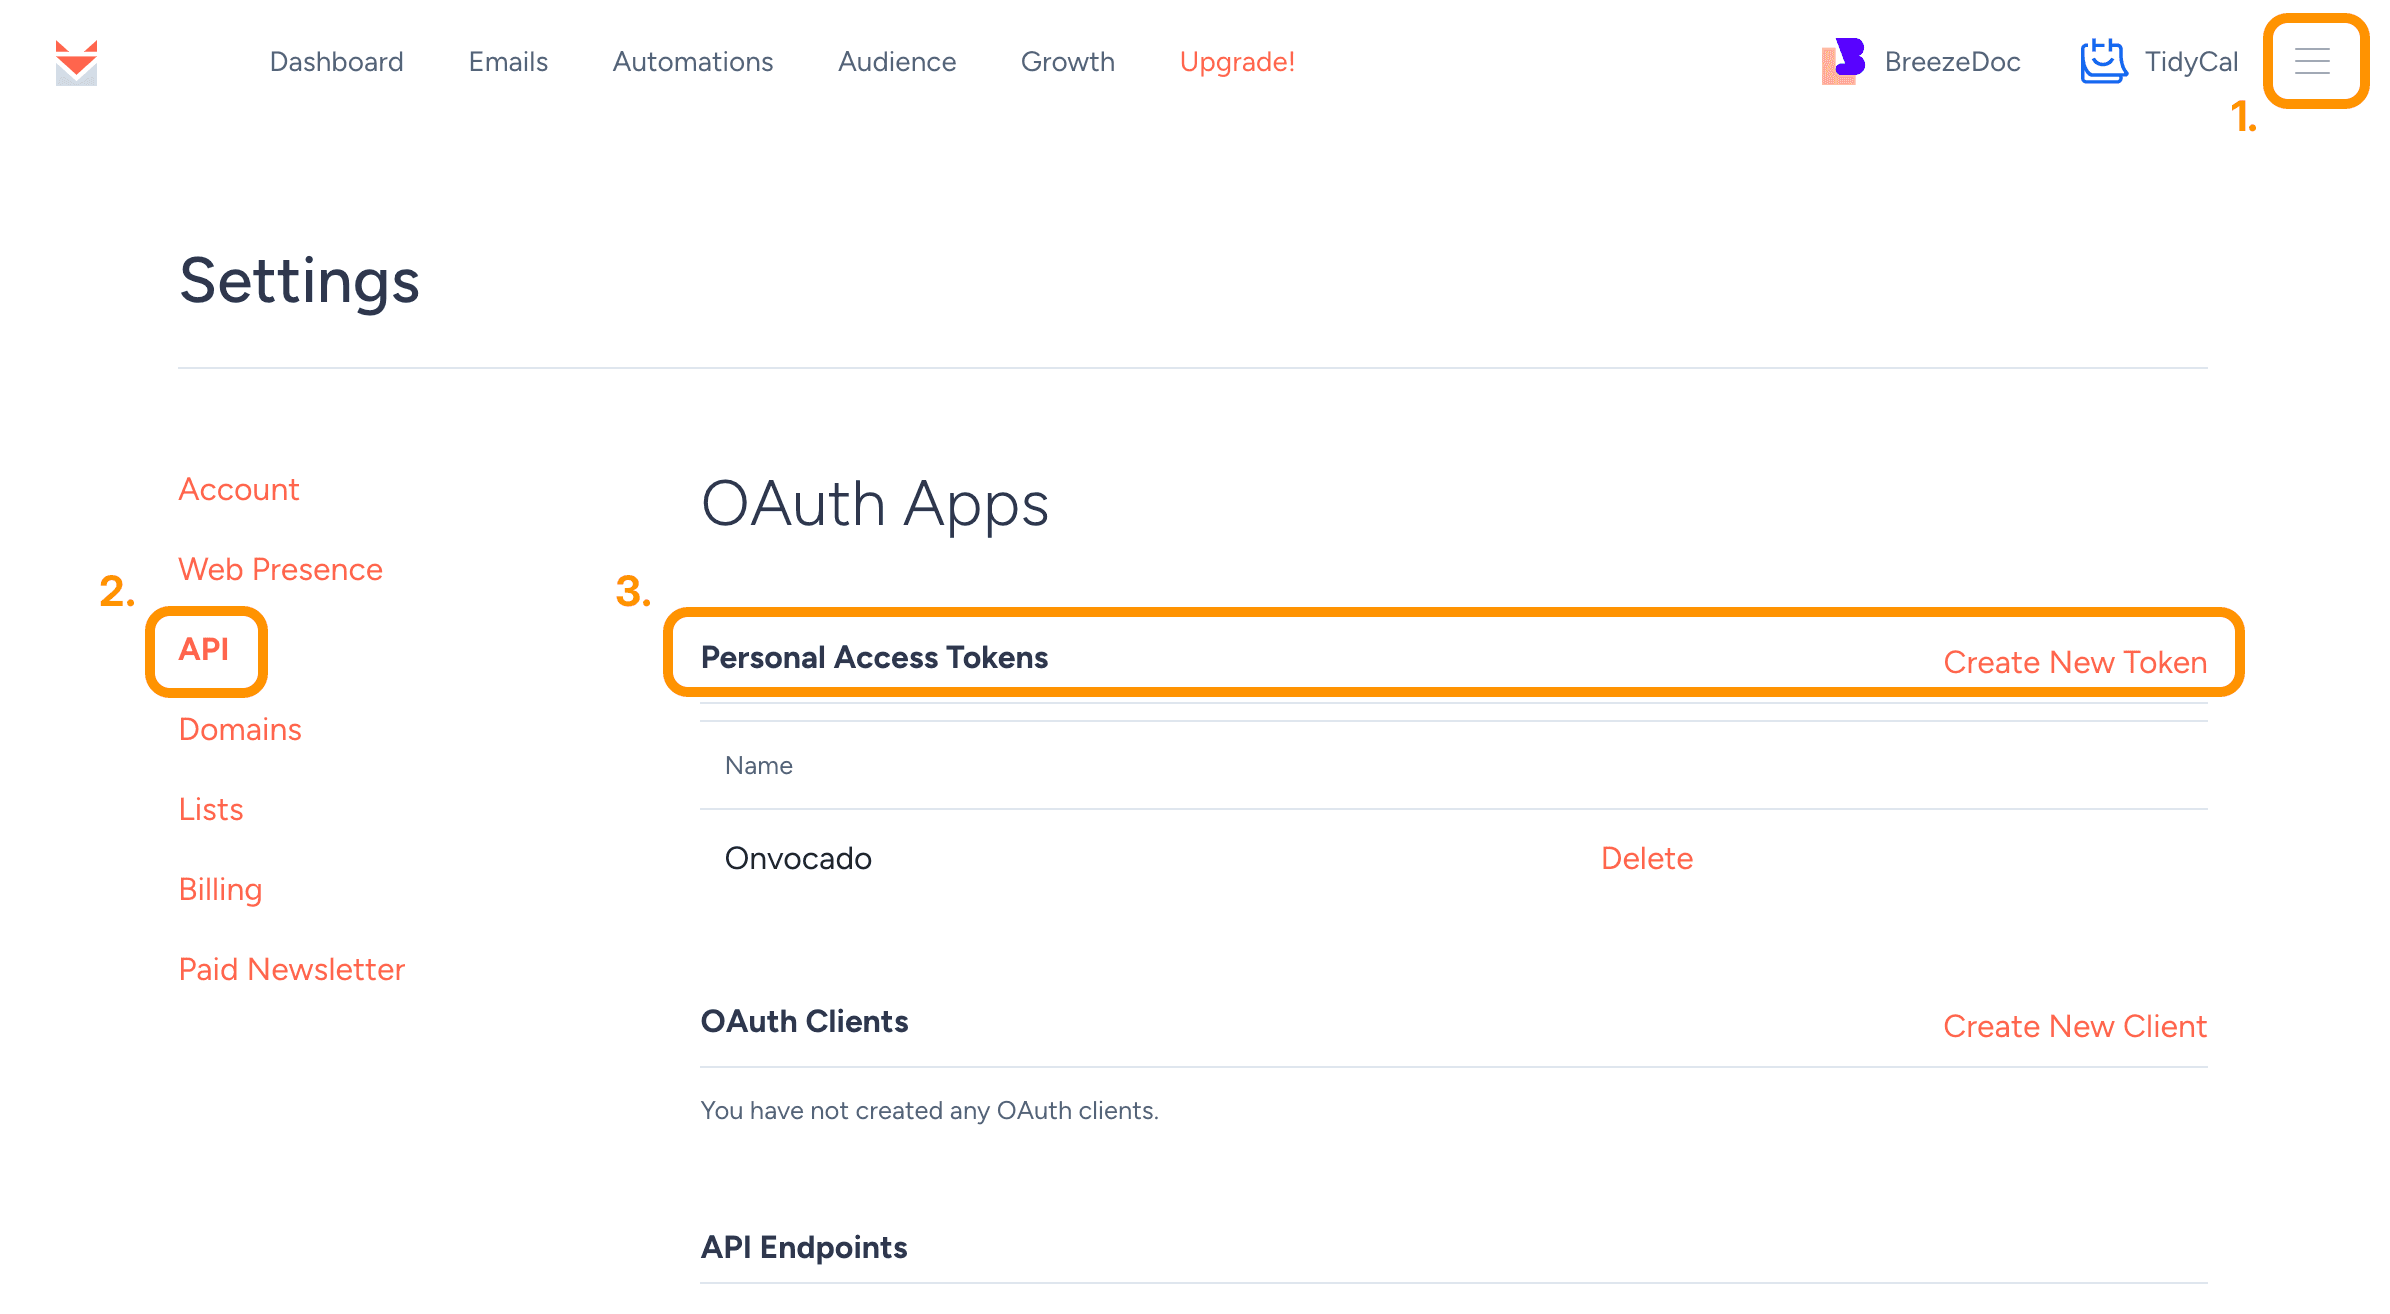
In the "Personal Access Tokens" section click on “Create New Token”. In the newly opened dialog, give your token a name and click "Create" to generate the token.
Copy the generated token to your clipboard. (Note: Be sure to copy it now, as you won’t be able to view it again.)
Step-by-Step Integration Guide
1. Log into Your Onvocado Account
Log in to your Onvocado account and go to the "Publish" settings for the Campaign you want to integrate.
2. Navigate to the Integrations Section
Once in the settings:
- Locate the Integrations Tab:
- Once in your campaign's "Publish" page, scroll to the the integrations menu, find and click on the "Browse More Integrations" button:
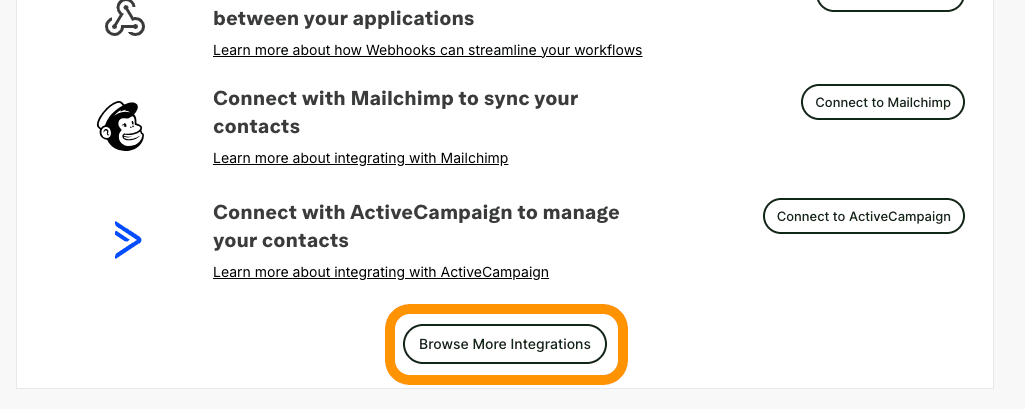
- Once in your campaign's "Publish" page, scroll to the the integrations menu, find and click on the "Browse More Integrations" button:
- Select SendFox:
- From the list of available integrations, select "SendFox". This will open the SendFox integration form where you'll input your credentials and configure settings.
3. Access the SendFox Integration Form
On the SendFox integration sidebar, you'll be presented with a form designed to capture all necessary information for a successful connection.
Note: Further details on how to retrieve SendFox API credentials can be found in this article.
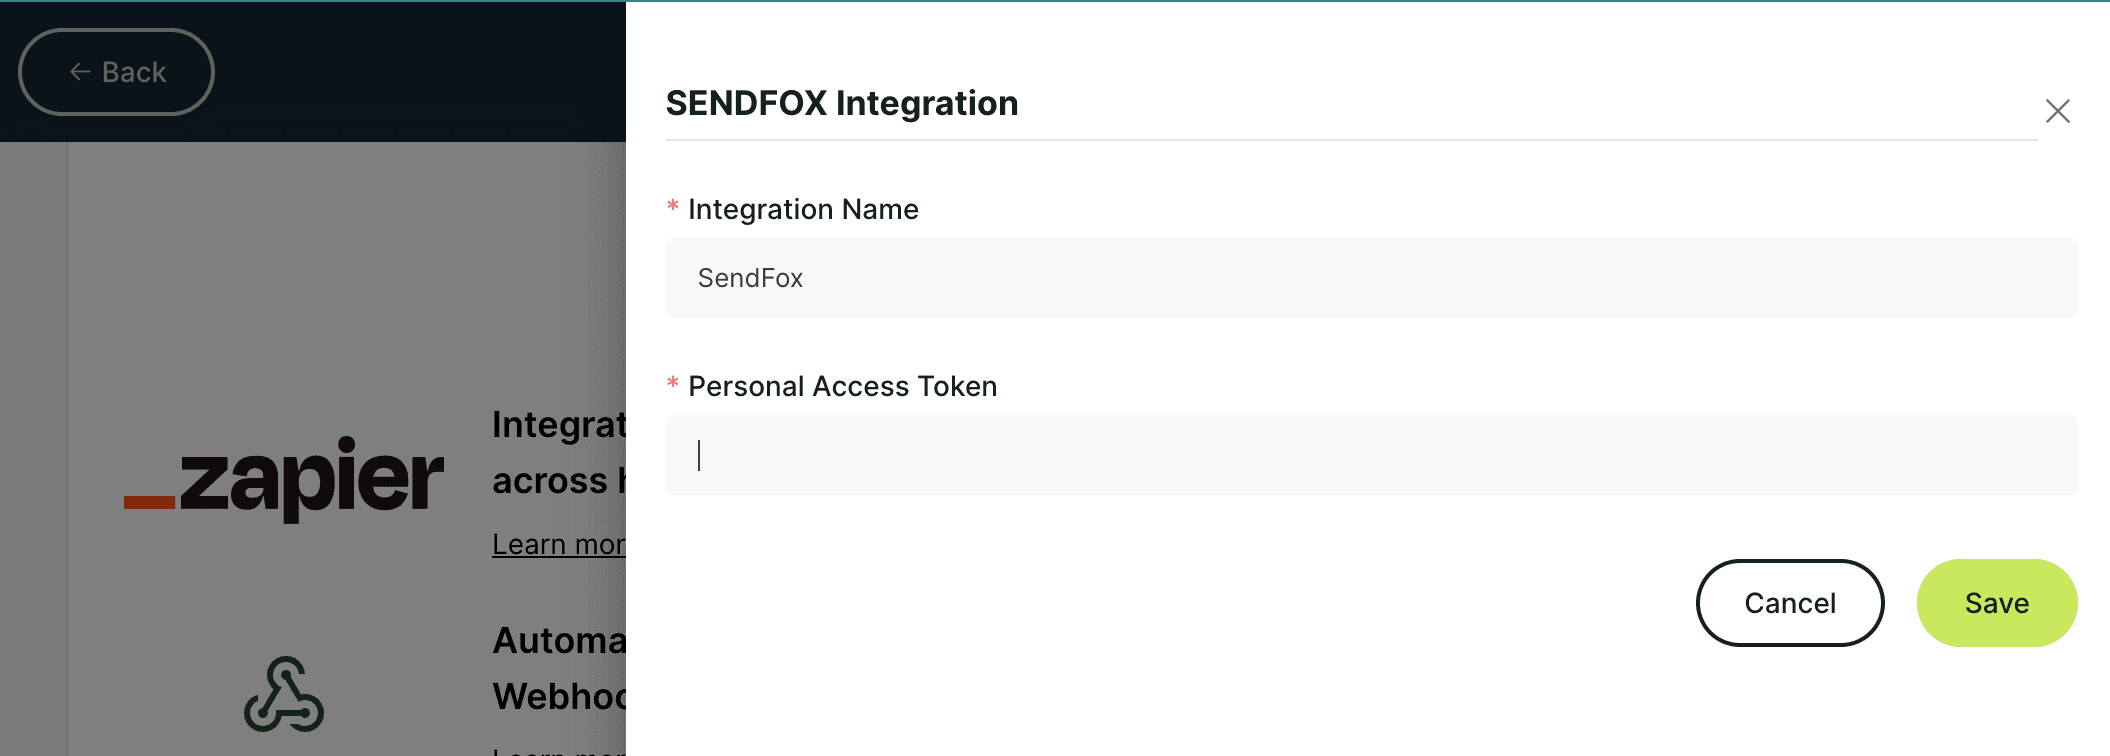
a. Integration Name
- Field: Integration Name
- Description: Provide a name for this integration. This helps in identifying the integration, especially if you have multiple integrations set up.
- Action: leave default or enter a descriptive name.
b. Enter Your SendFox Personal Access Token and click "Save"
- Field: Personal Access Token
- Description: The "personal access token" is a unique identifier that allows Onvocado to communicate securely with SendFox.
d. Select a SendFox List (optional)
- Field: SendFox List
- Description: Choose the specific contact list from SendFox where you want to sync your Onvocado leads.
- Action: Select the desired list from the dropdown menu.
4. Configure Field Mapping
Mapping your internal Onvocado fields to SendFox fields ensures that data is correctly transferred and utilized in your marketing campaigns.
a. Internal Field
- Description: These are the labels of the form elements used in your Onvocado widget.
- Action: Review the list of internal fields displayed on the left side of the mapping section.
b. External Field
- Description: These are the corresponding field names in SendFox where the data will be sent.
- Action: For each internal field, select the appropriate SendFox field from the dropdown on the right.
Important: Ensure that the external "email" field is mapped and marked as active since it's mandatory for SendFox.
c. Activate All Fields (Optional)
- Feature: All Fields Active Checkbox
- Description: Toggles the activation state of all field mappings.
- Action: Use this checkbox to quickly activate or deactivate all mappings based on your preference.
5. Save and Activate the Integration
After configuring all necessary fields:
- Review Your Settings:
- Ensure that all required fields are filled out correctly.
- Verify that the Email field is mapped and active.
- Save Changes:
- Click the "Done" button to save and activate the integration.
- Confirmation:
- A success message, such as "Save successful!", will appear, indicating that the integration has been successfully set up.
6. Test the Integration
To ensure that everything is working as expected:
- Add a Test Lead:
- Create a new lead using an Onvocado widget.
- Verify in SendFox:
- Log into SendFox and check if the new lead appears in the selected list with the correct data mapped.
- Troubleshoot if Necessary:
- If the lead doesn't appear or data is mismatched, revisit the integration settings to ensure that all fields are correctly mapped and that the API credentials are accurate.
Tips for a Smooth Integration
- Secure Your Personal Access Token:
Treat your Personal Access Token as confidential. Never share it publicly or expose it in unsecured environments to protect your data. - Regularly Update Credentials:
If you regenerate your SendFox Personal Access Token, promptly update it in Onvocado to avoid integration disruptions and maintain seamless functionality. - Leverage SendFox’s Features:
Once integrated, take full advantage of SendFox’s automation and segmentation tools to optimize your marketing strategies and achieve better results.
Conclusion
By connecting Onvocado with SendFox, you unlock the full potential of your marketing strategy. Automate data synchronization and leverage SendFox’s advanced email marketing and CRM tools to boost customer engagement, streamline workflows, and drive impactful business outcomes. This step-by-step guide ensures a smooth integration setup, so you can start optimizing your campaigns right away.
Have any questions or need assistance? Reach out to our support team for expert help.