Setting up Campaign Triggers & Display Freqency
Fine-tune your pop-ups with smart triggers and perfect timing.
- Written by Onvocado Staff |
- February 06, 2025
In this guide, we’ll walk you through the Triggers and Frequency settings within Onvocado. You'll learn how to configure when your pop-up appears and how often it reappears to optimize visitor engagement.
Triggers: When Should Your Pop-Up Appear?
Triggers are the rules that determine when your Onvocado pop-up shows up. You can set them individually or in combination to create a highly targeted engagement strategy. Here’s a look at each trigger option: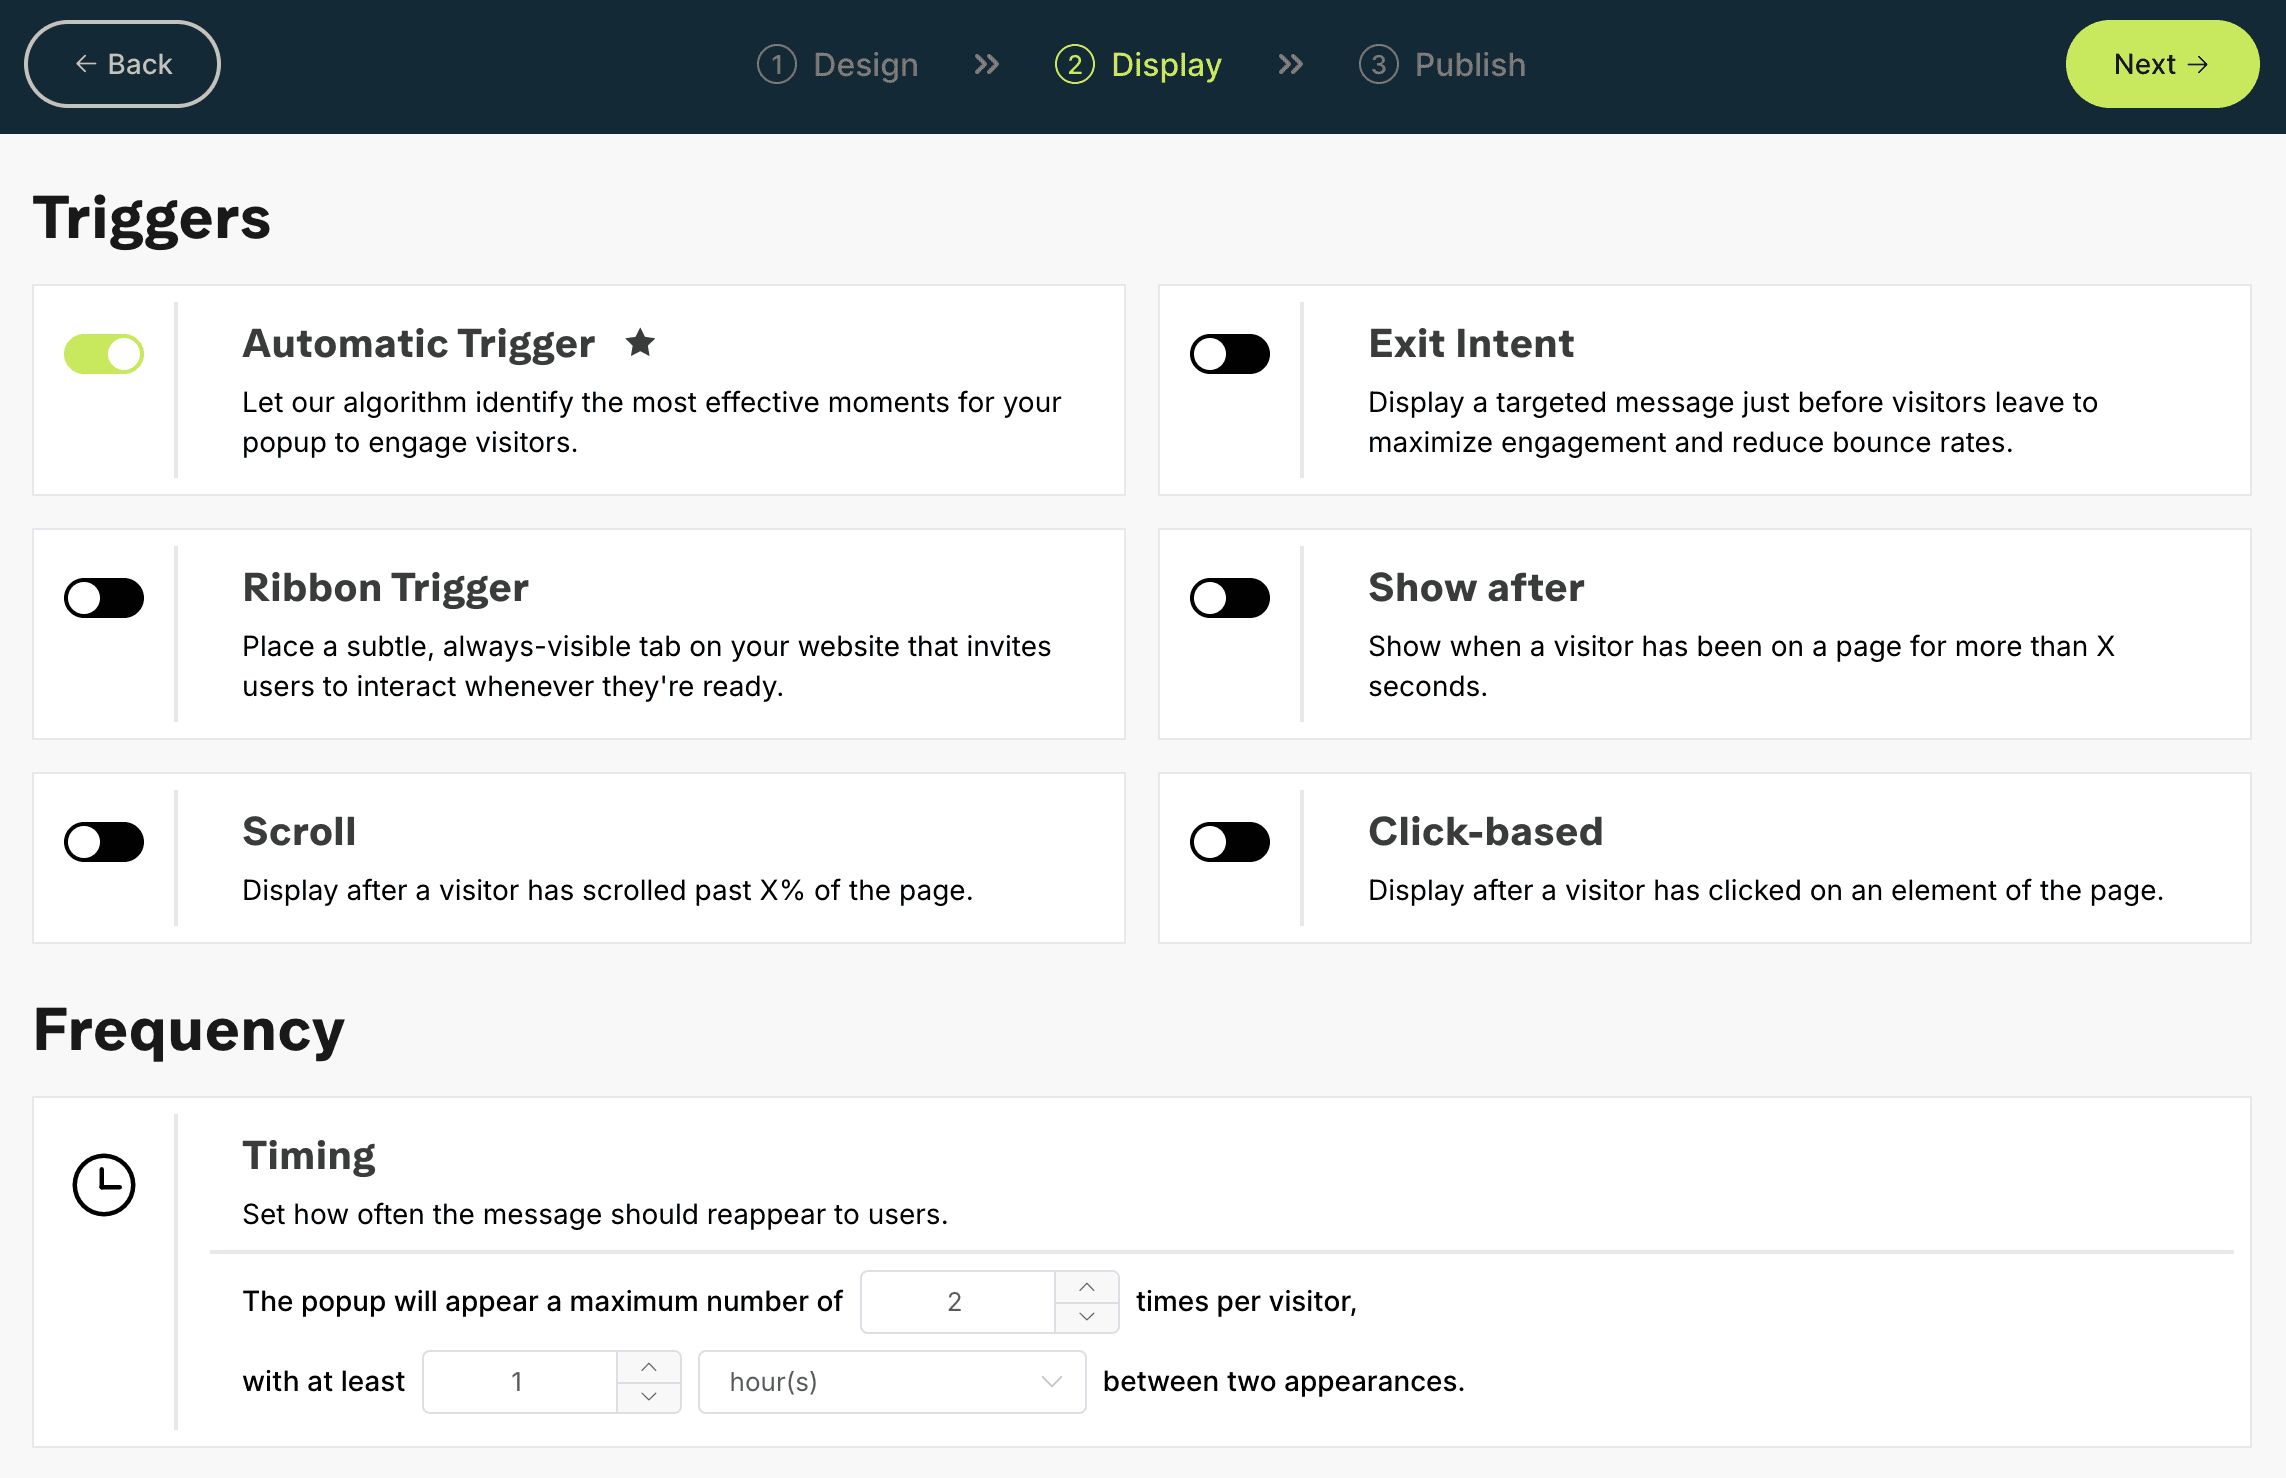
1. Automatic Trigger
Overview:
Harness the power of our ever-evolving, research-backed algorithm to decide the perfect moment for your pop-up. We’ve poured serious user psychology insights into this feature, so it finds that sweet spot between “helpful” and “non-intrusive.”
How It Works:
Turn it on and let Onvocado’s behind-the-scenes magic analyze visitor actions (like mouse movements, click activity, and time on page) to display your message when engagement is most likely.
How to Use It:
Flip the toggle to On—that’s it! (Total “set it and forget it” style.)
Business Tip:
If you’re looking for an effortless way to get started, the Automatic Trigger is your new best friend. No guesswork—just let Onvocado do the heavy lifting.
2. Exit Intent
Overview:
Ever wish you could grab your visitors’ attention just before they leave? Exit Intent does exactly that by detecting when the visitor’s cursor heads toward the browser’s edge.
How to Use It:
Head to the trigger settings and flip the toggle for “Exit Intent.”
Business Tip:
This is a brilliant way to pitch a special offer, highlight free shipping, or provide a sign-up form right before visitors bounce. Think of it like your pop-up “emergency brake.”
3. Ribbon Trigger
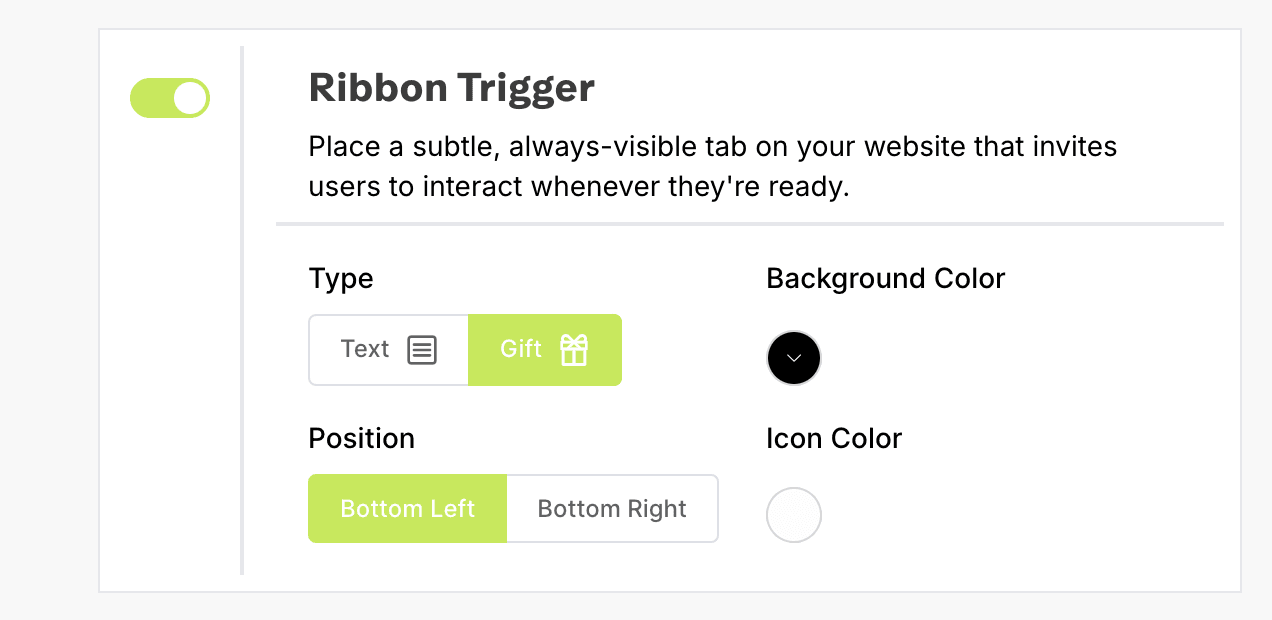
Overview:
Place a subtle little tab on your site that’s always there—ready and waiting. Visitors can click it any time they’re curious or want more info.
How to Use It:
- Toggle the Ribbon Trigger option.
- Pick your favorite style—Text or Gift—via the radio buttons.
- Personalize your ribbon’s background and icon colors using the color pickers.
- Choose its position (e.g., Bottom Left or Bottom Right).
Business Tip:
Ribbons are a soft-sell approach. Let visitors come to you, rather than forcing a pop-up in their face. Ideal if you want to keep things chill yet accessible.
4. Show After
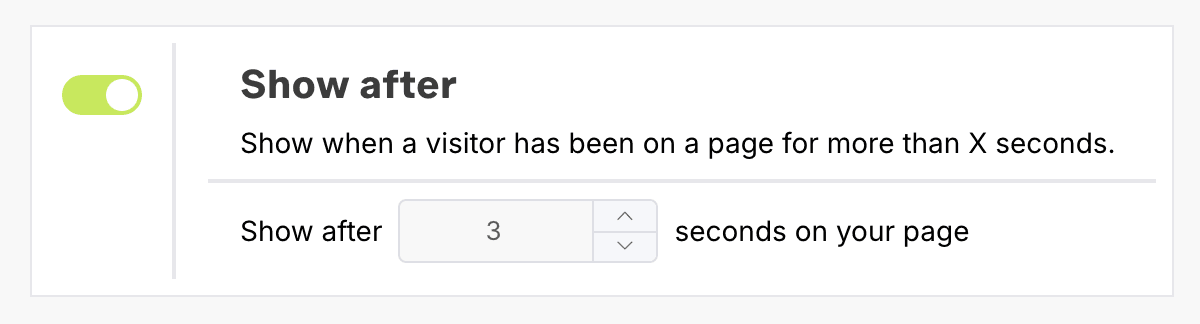
Overview:
A simple “timer-based” approach: wait a certain number of seconds before your pop-up appears. Perfect for giving folks a chance to settle in and get a feel for your page.
How to Use It:
- Enable the Show After toggle.
- Type in how many seconds you want visitors to hang around before they see your campaign.
Business Tip:
We usually suggest not setting it to 0—nobody likes an in-your-face pop-up the second they arrive. Let them breathe a bit first.
5. Scroll Trigger
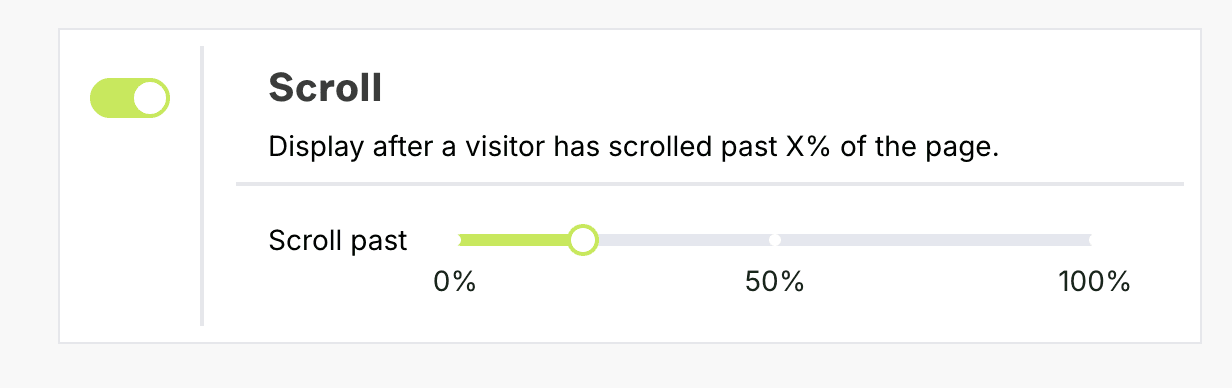
Overview:
Display your pop-up after a visitor scrolls a certain percentage down the page. It’s ideal for content-heavy sites—think blogs or long landing pages—where you want them to read a portion before making your pitch.
How to Use It:
- Switch on Scroll Trigger.
- Use the slider to choose how far down the page (in percentage) a visitor should scroll before the pop-up shows up.
Business Tip:
Great for situations where you want readers to get some context first. For instance, after reading the intro to a blog post, they might be more open to subscribing to your newsletter.
6. Click-Based Trigger
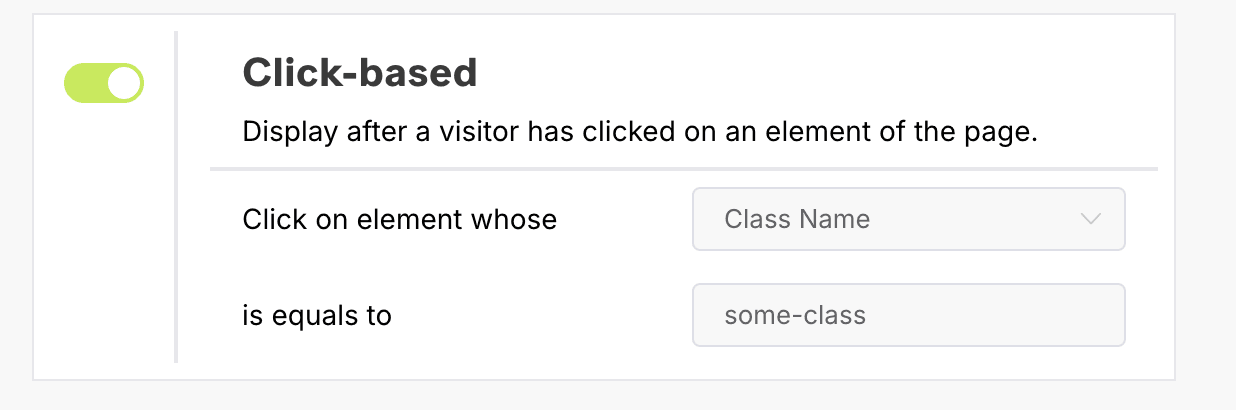
Overview:
Want total precision? Set your campaign to appear only when a user clicks a particular element on your site. Perfect for eBooks, special discounts, or any time you want a pop-up to show on demand.
How to Use It:
- Toggle Click-Based Trigger to on.
- In the input field, specify the target element’s class or ID.
- Example: If you want the pop-up to appear when someone clicks the “Buy Now” button, grab that button’s class or ID using your browser’s Inspect tool and paste it here.
Business Tip:
This is super handy if you only want to show the pop-up to highly engaged visitors—like those who click on a product image or a “Learn More” banner.
Frequency: How often should visitors see the pop-up?
Once you’ve nailed down when to show your pop-up, it’s important to control how often it’s displayed to each visitor. This helps you avoid overwhelming your audience while still ensuring effective engagement.
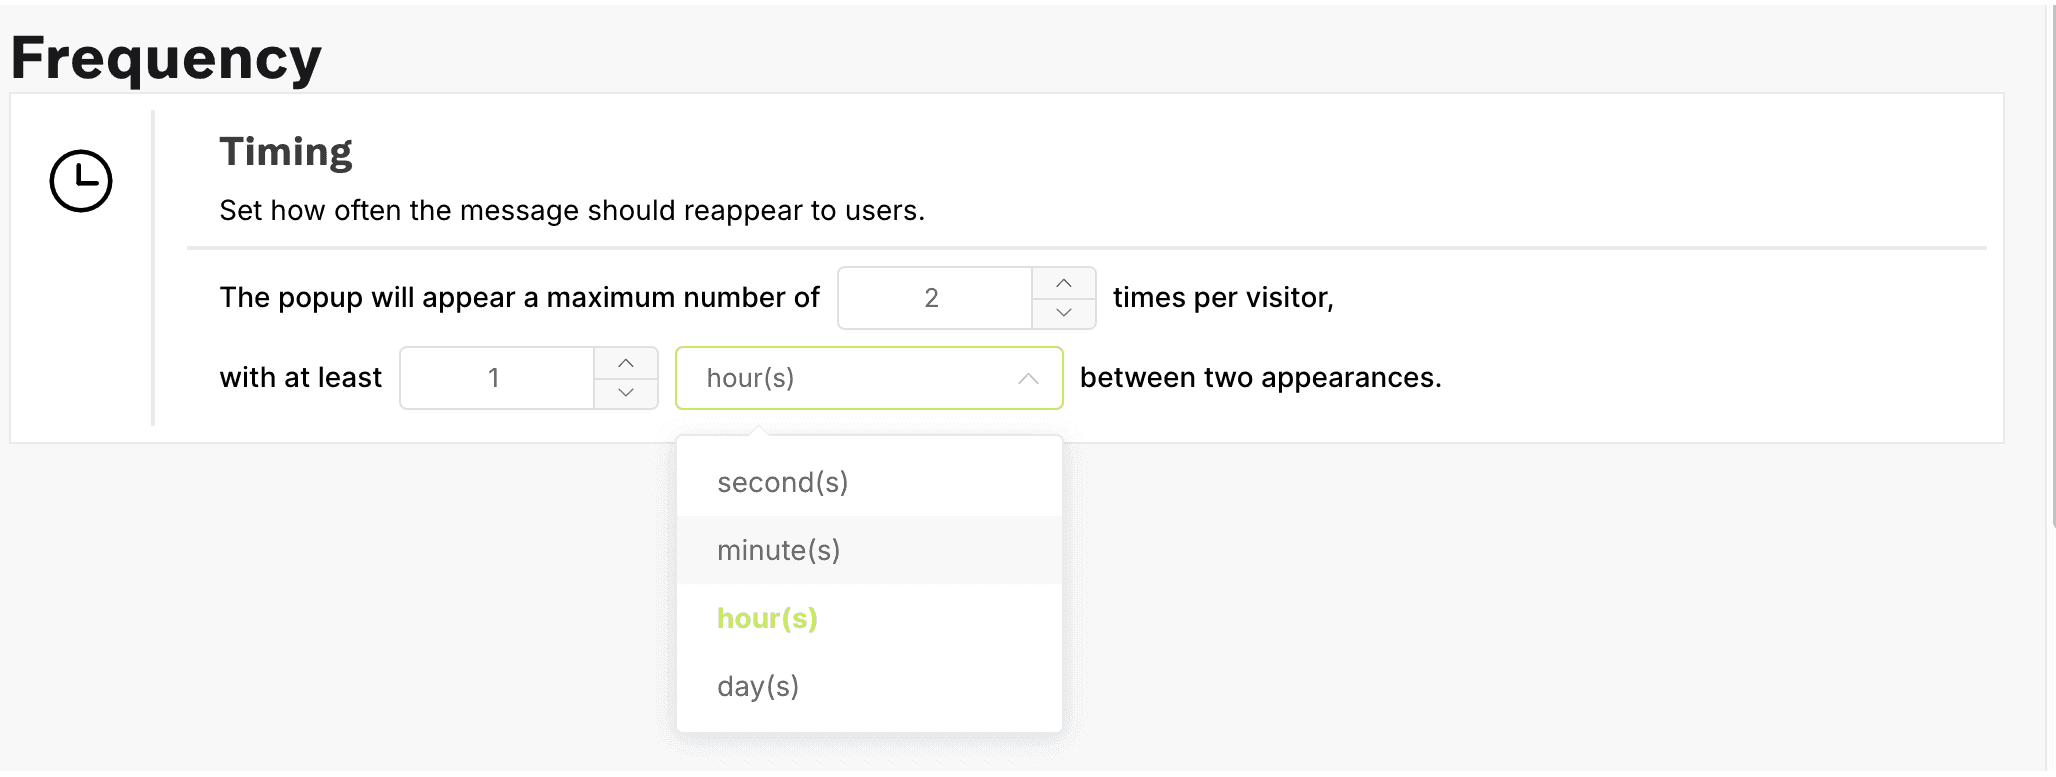
Timing
- Overview:
The Timing settings allow you to set the maximum number of times your pop-up will appear for each visitor and the minimum interval between displays. - How to Use It:
- Maximum Appearances:
Use the numeric input field with the increment/decrement buttons to specify the maximum number of pop-up displays per visitor. - Interval Between Appearances:
Set the delay (using another numeric input) along with selecting the time unit (seconds, minutes, etc.) from the dropdown menu.
- Maximum Appearances:
- Business Tip:
Striking the right balance means your pop-up is seen enough to be effective without becoming a nuisance.
Tying It All Together
Now that you know your trigger options, feel free to mix, match, and test which combination works best for your site. Maybe you want a quick “Show After 3 seconds” plus an “Exit Intent” as backup. Or a “Ribbon Trigger” on mobile and “Scroll Trigger” on desktop. The possibilities are endless!
- Access Campaign Settings via your Onvocado dashboard.
- Enable the triggers you want.
- Preview and test on your own site to make sure everything looks and feels smooth.
- Go live and watch your engagement soar.
And there you have it—everything you need to harness Onvocado’s trigger settings with a bit more flair. If you have questions or want more help, head to our Help Center or reach out to our support team. We’re always happy to lend a hand!