A Guide for Setting Up Onvocado
A step-by-step walkthrough to set up Onvocado, ensuring a smooth start for effective website engagement and data management.
- Written by Onvocado Staff |
- February 06, 2025
Congrats on taking the first step toward boosting conversions, capturing leads, and truly engaging your visitors with Onvocado! This guide will walk you through your Onvocado setup and introduce you to some of our most popular features designed to help you better connect with your audience and drive more sales.
Part 1 – Getting Started
There are two essential steps to get Onvocado up and running on your site.
Step 1 – Embed Your Snippet
- Access Your Dashboard:
Log in to your Onvocado account and navigate to the Settings > Embed section.
- Copy Your Unique Code:
Click the "Copy" button to grab your unique Onvocado snippet. This single line of code is what brings Onvocado’s engagement features to life on your website.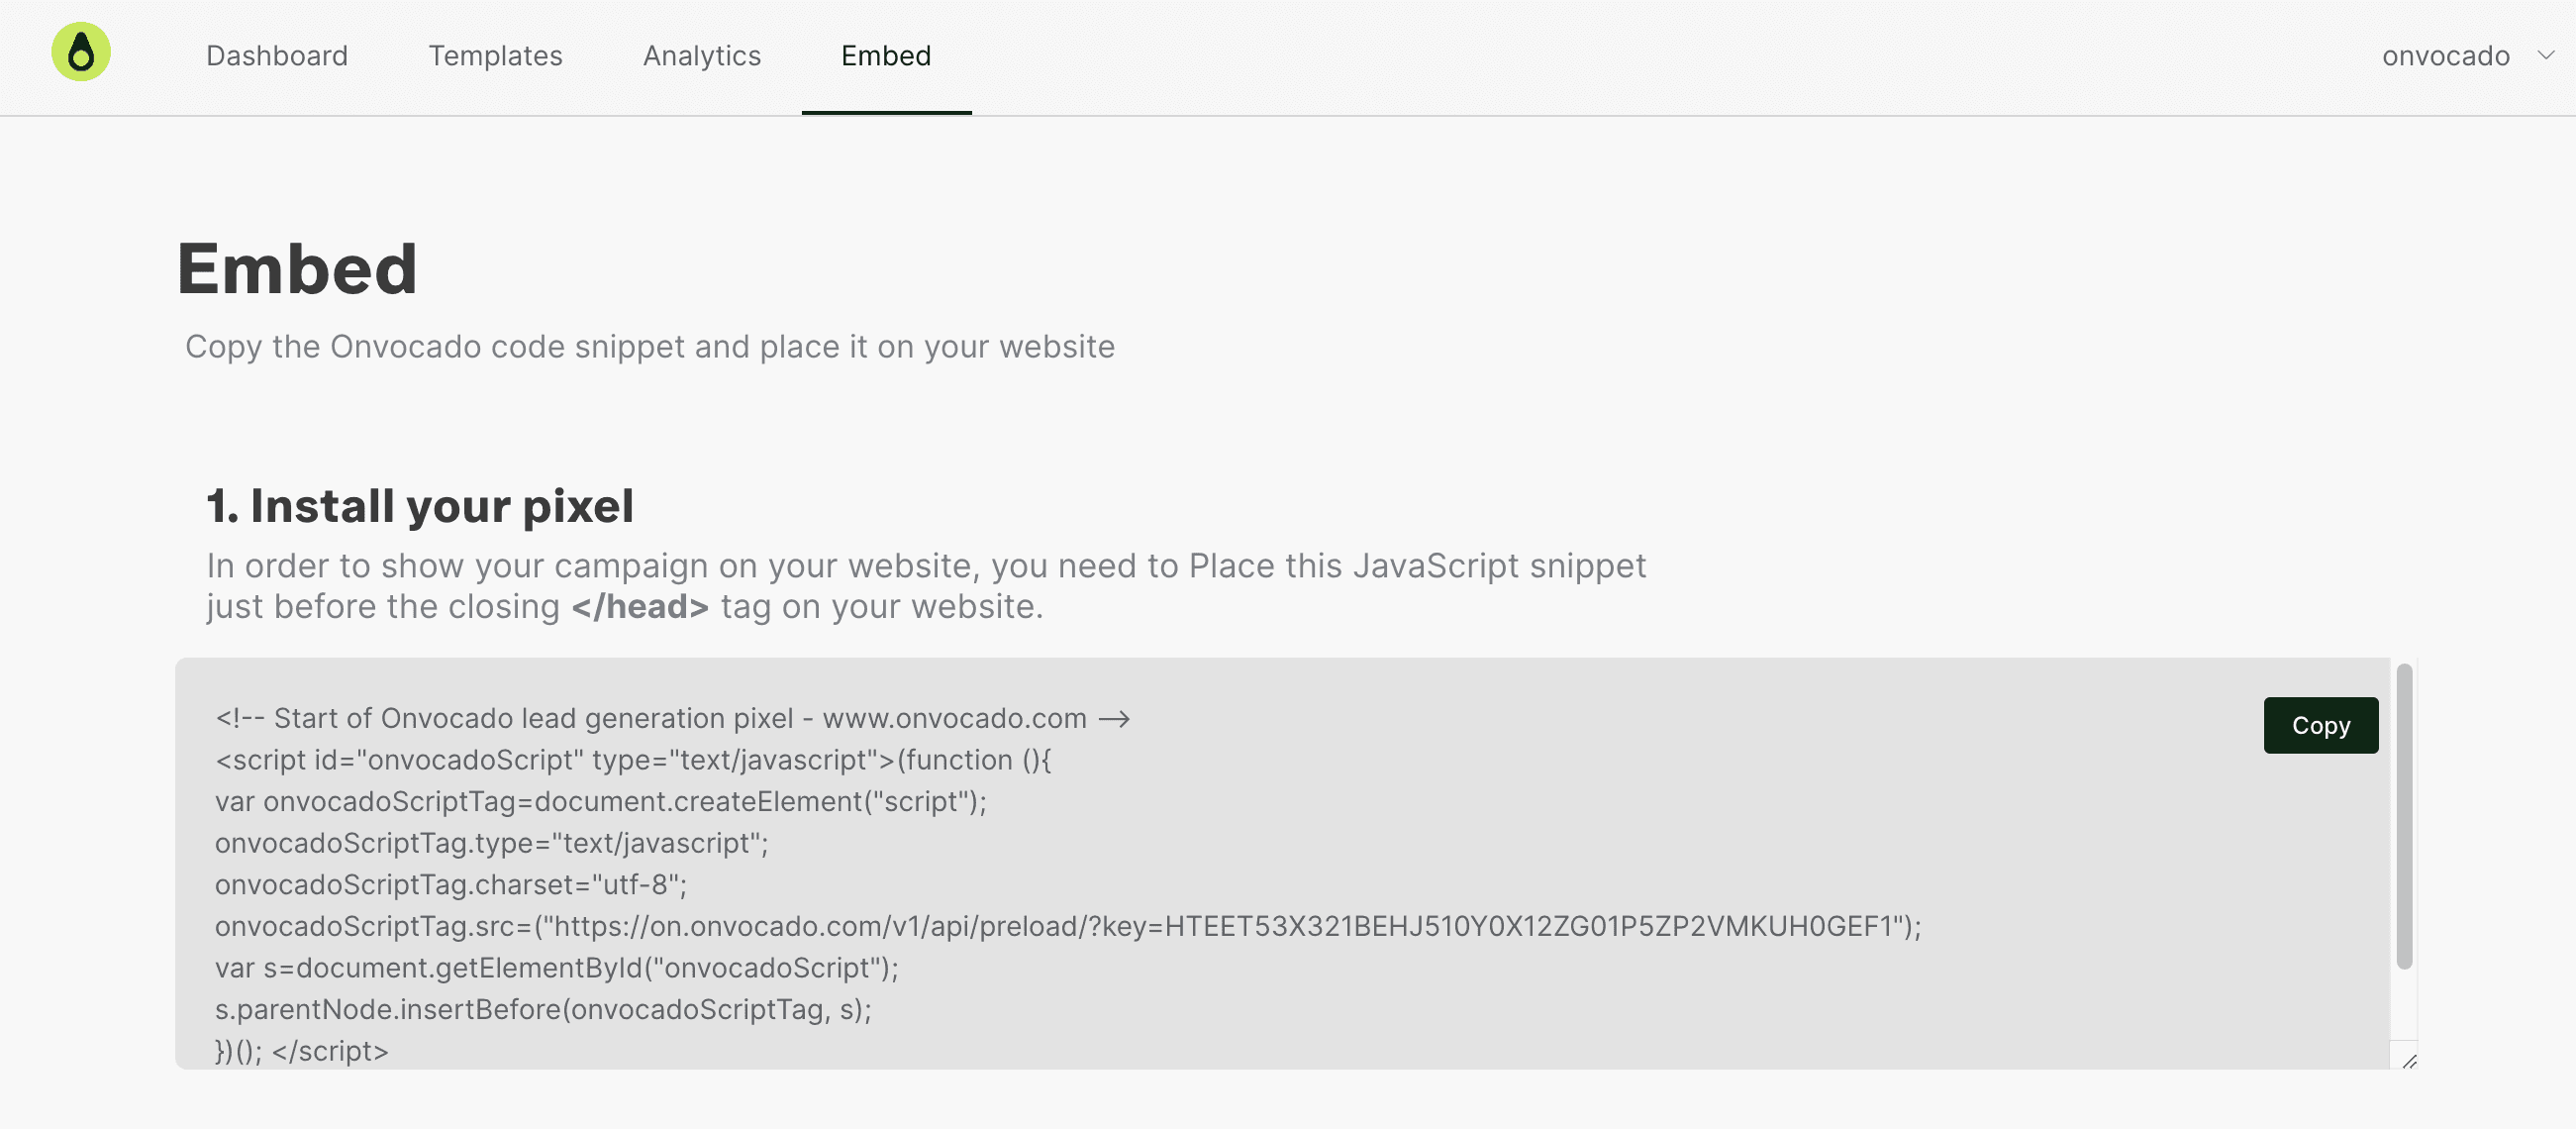
- Paste the Snippet:
Insert the snippet right before the closing</body>tag on your site’s HTML.
Tip: If you installed Onvocado through a partner platform or app marketplace, the snippet may already be embedded for you.
If you'd like a detailed walkthrough of the embedding process, check out our embed help article.
Step 2 – Create Your campaign
- Navigate to Templates:
In your Onvocado menu, head to the Integrations tab.
Choose a template and provide a website and name for your campaign. Click Confirm.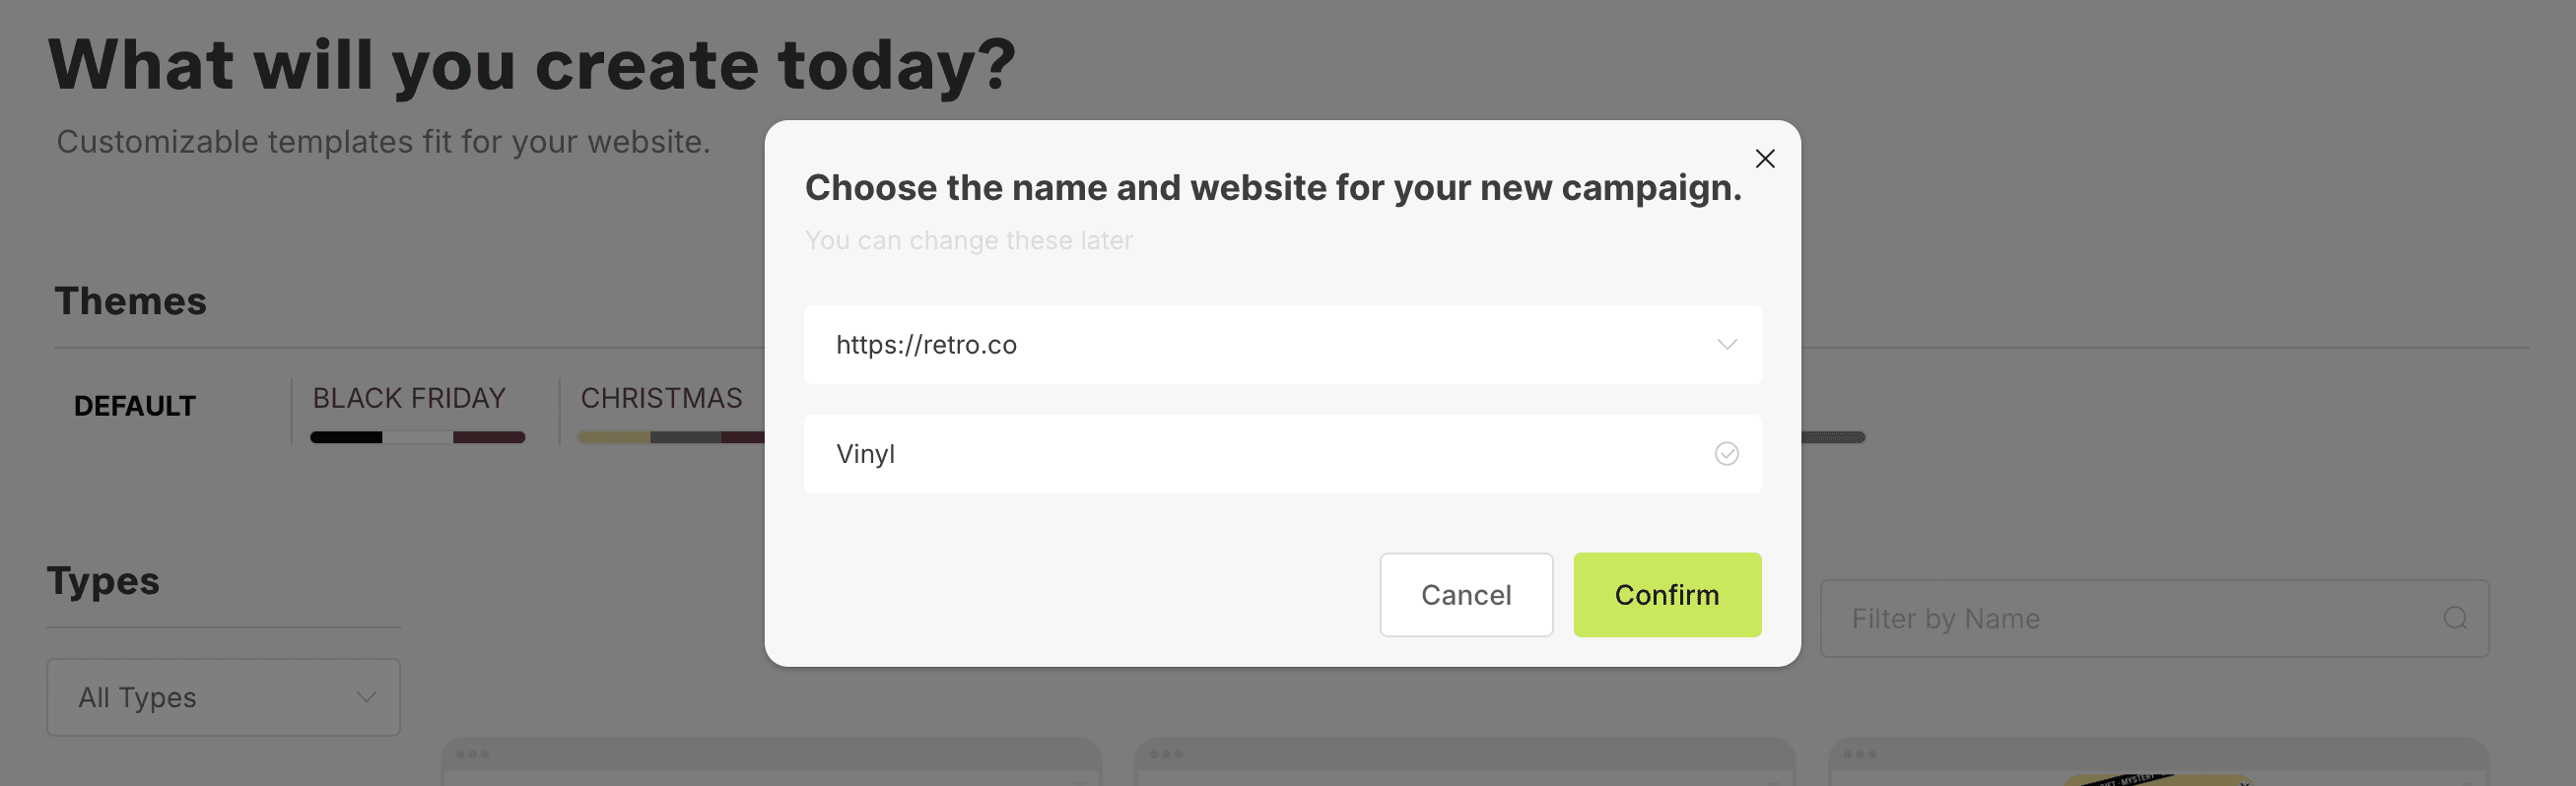
Part 2 – Customize Your Visitor Experience
Step 1 – Customize Your Campaign Content
In our editor, add the content, design, and form fields that best match your desired use case.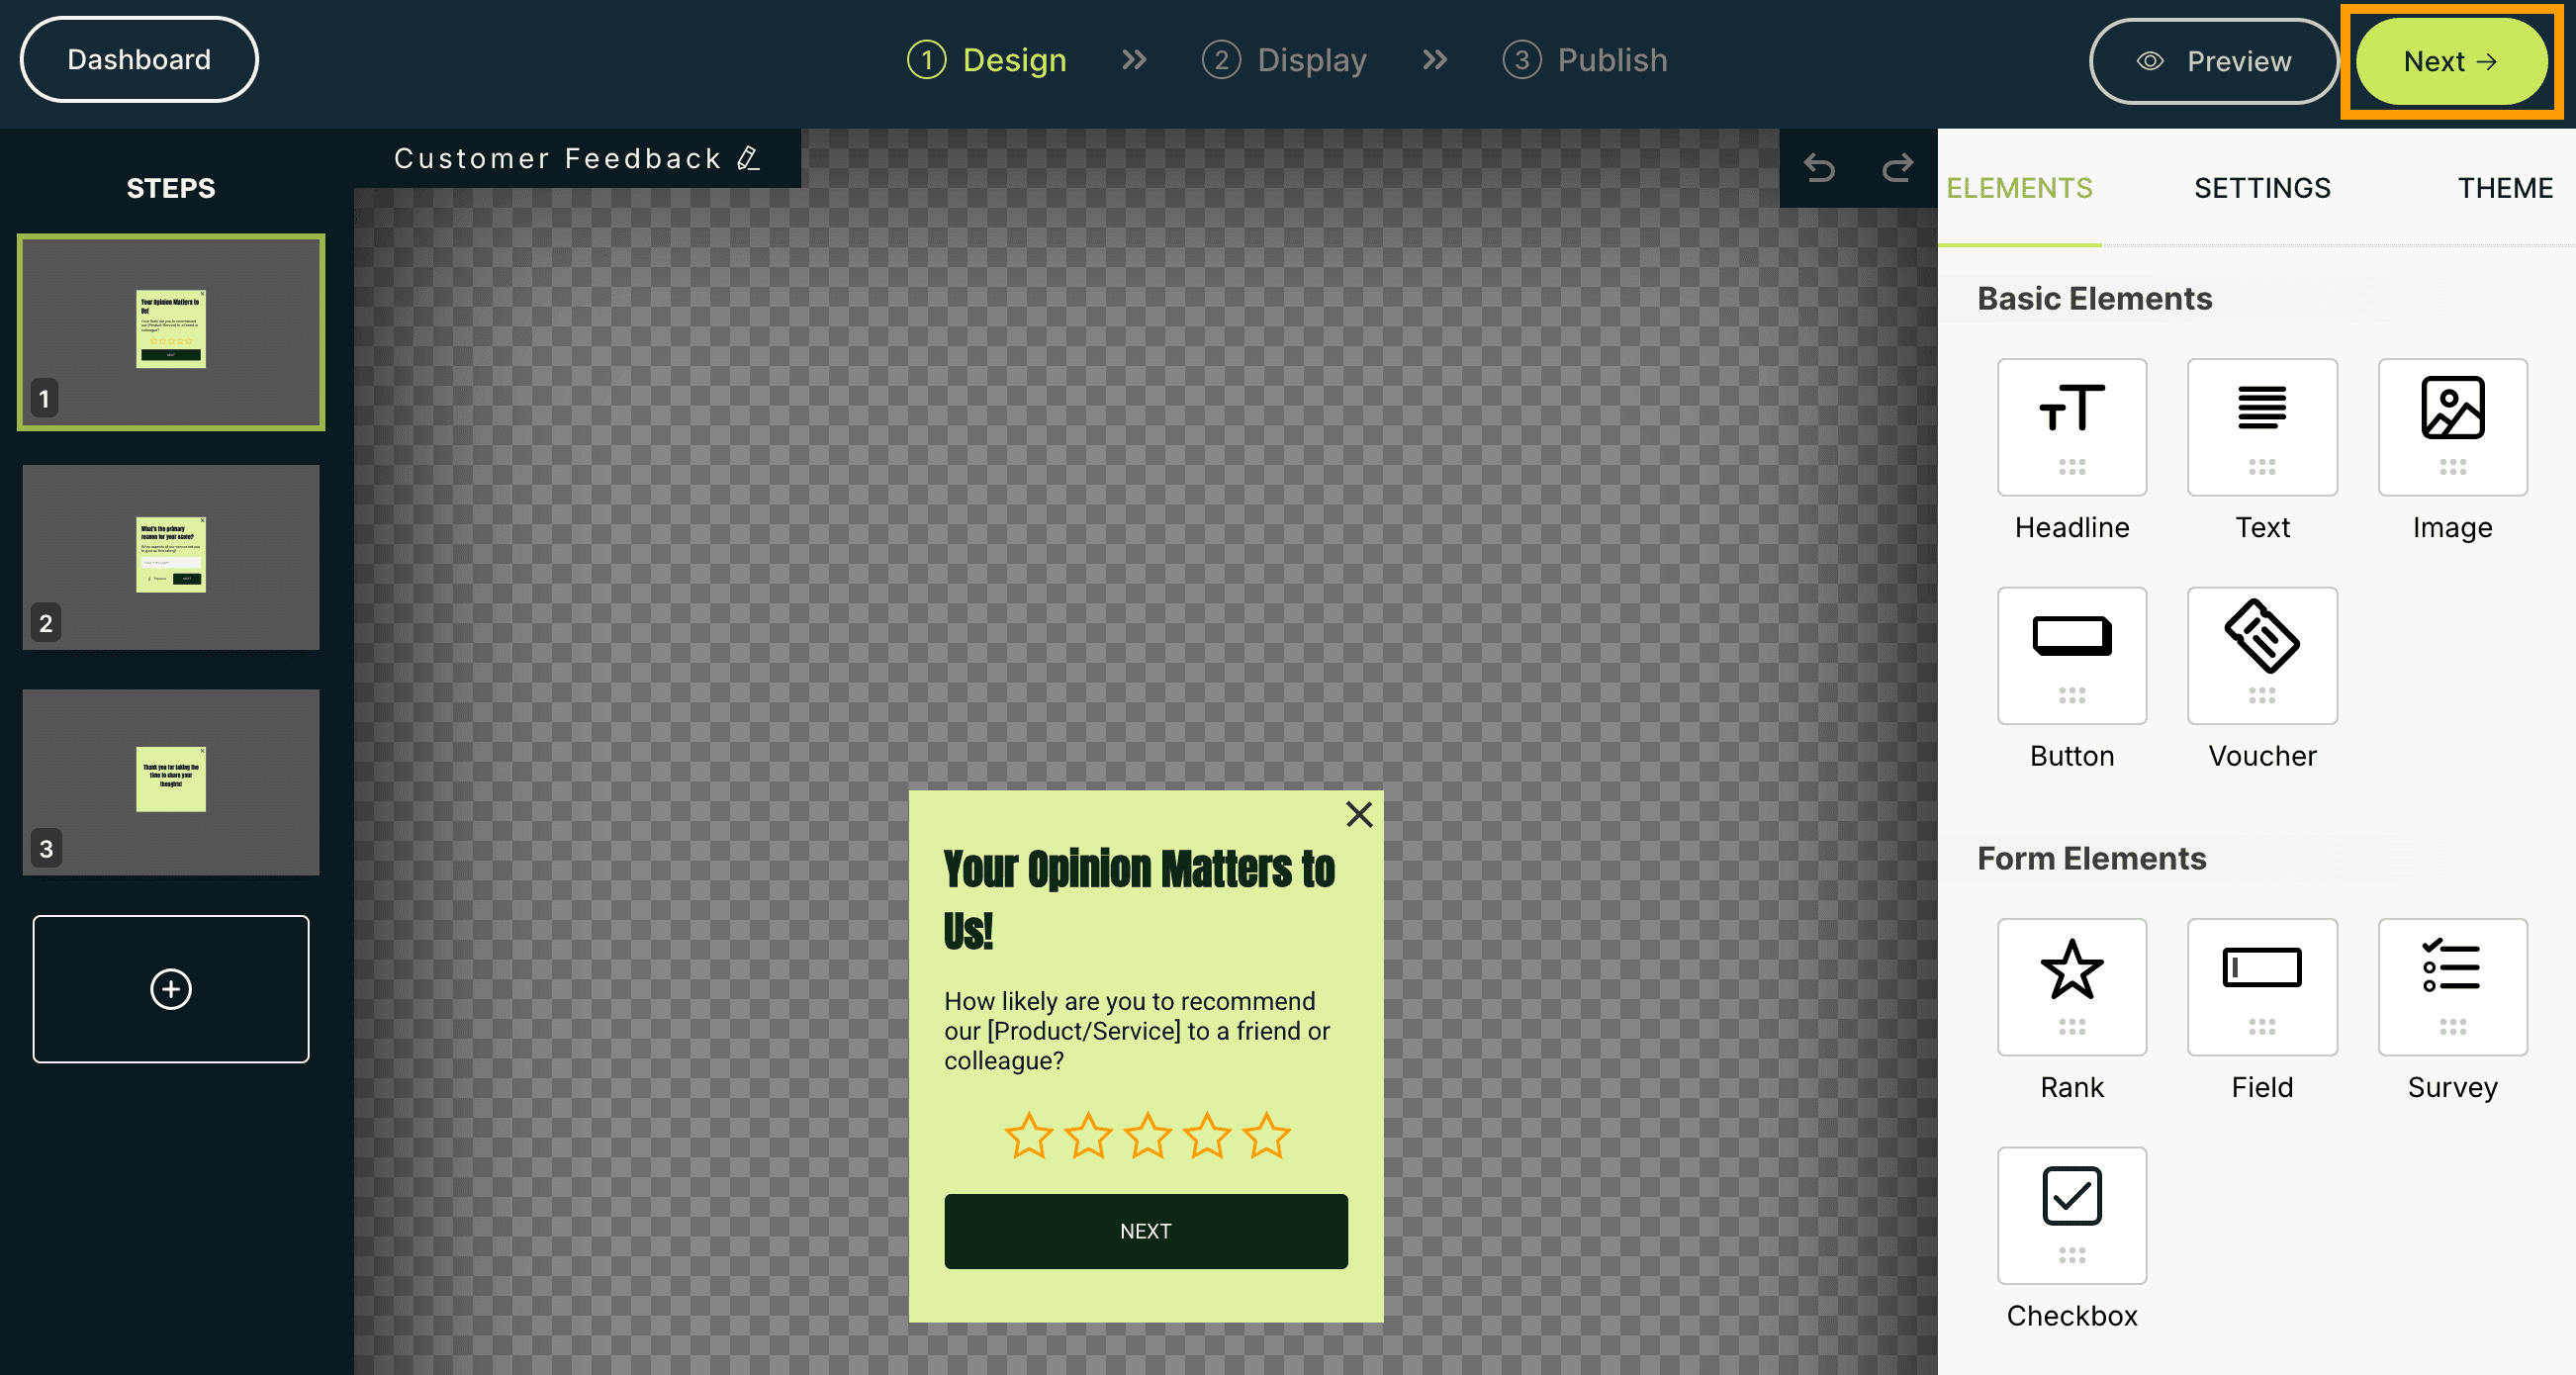
Once you’re happy with the result, click Next in the top-right corner.
Step 2 – Set Up Display Settings (Triggers / Frequency / Location)
Navigate to your campaign’s Display Settings. Here, you can configure when and where your campaign appears on your site. For more detailed instructions, check out our Display Settings guide. 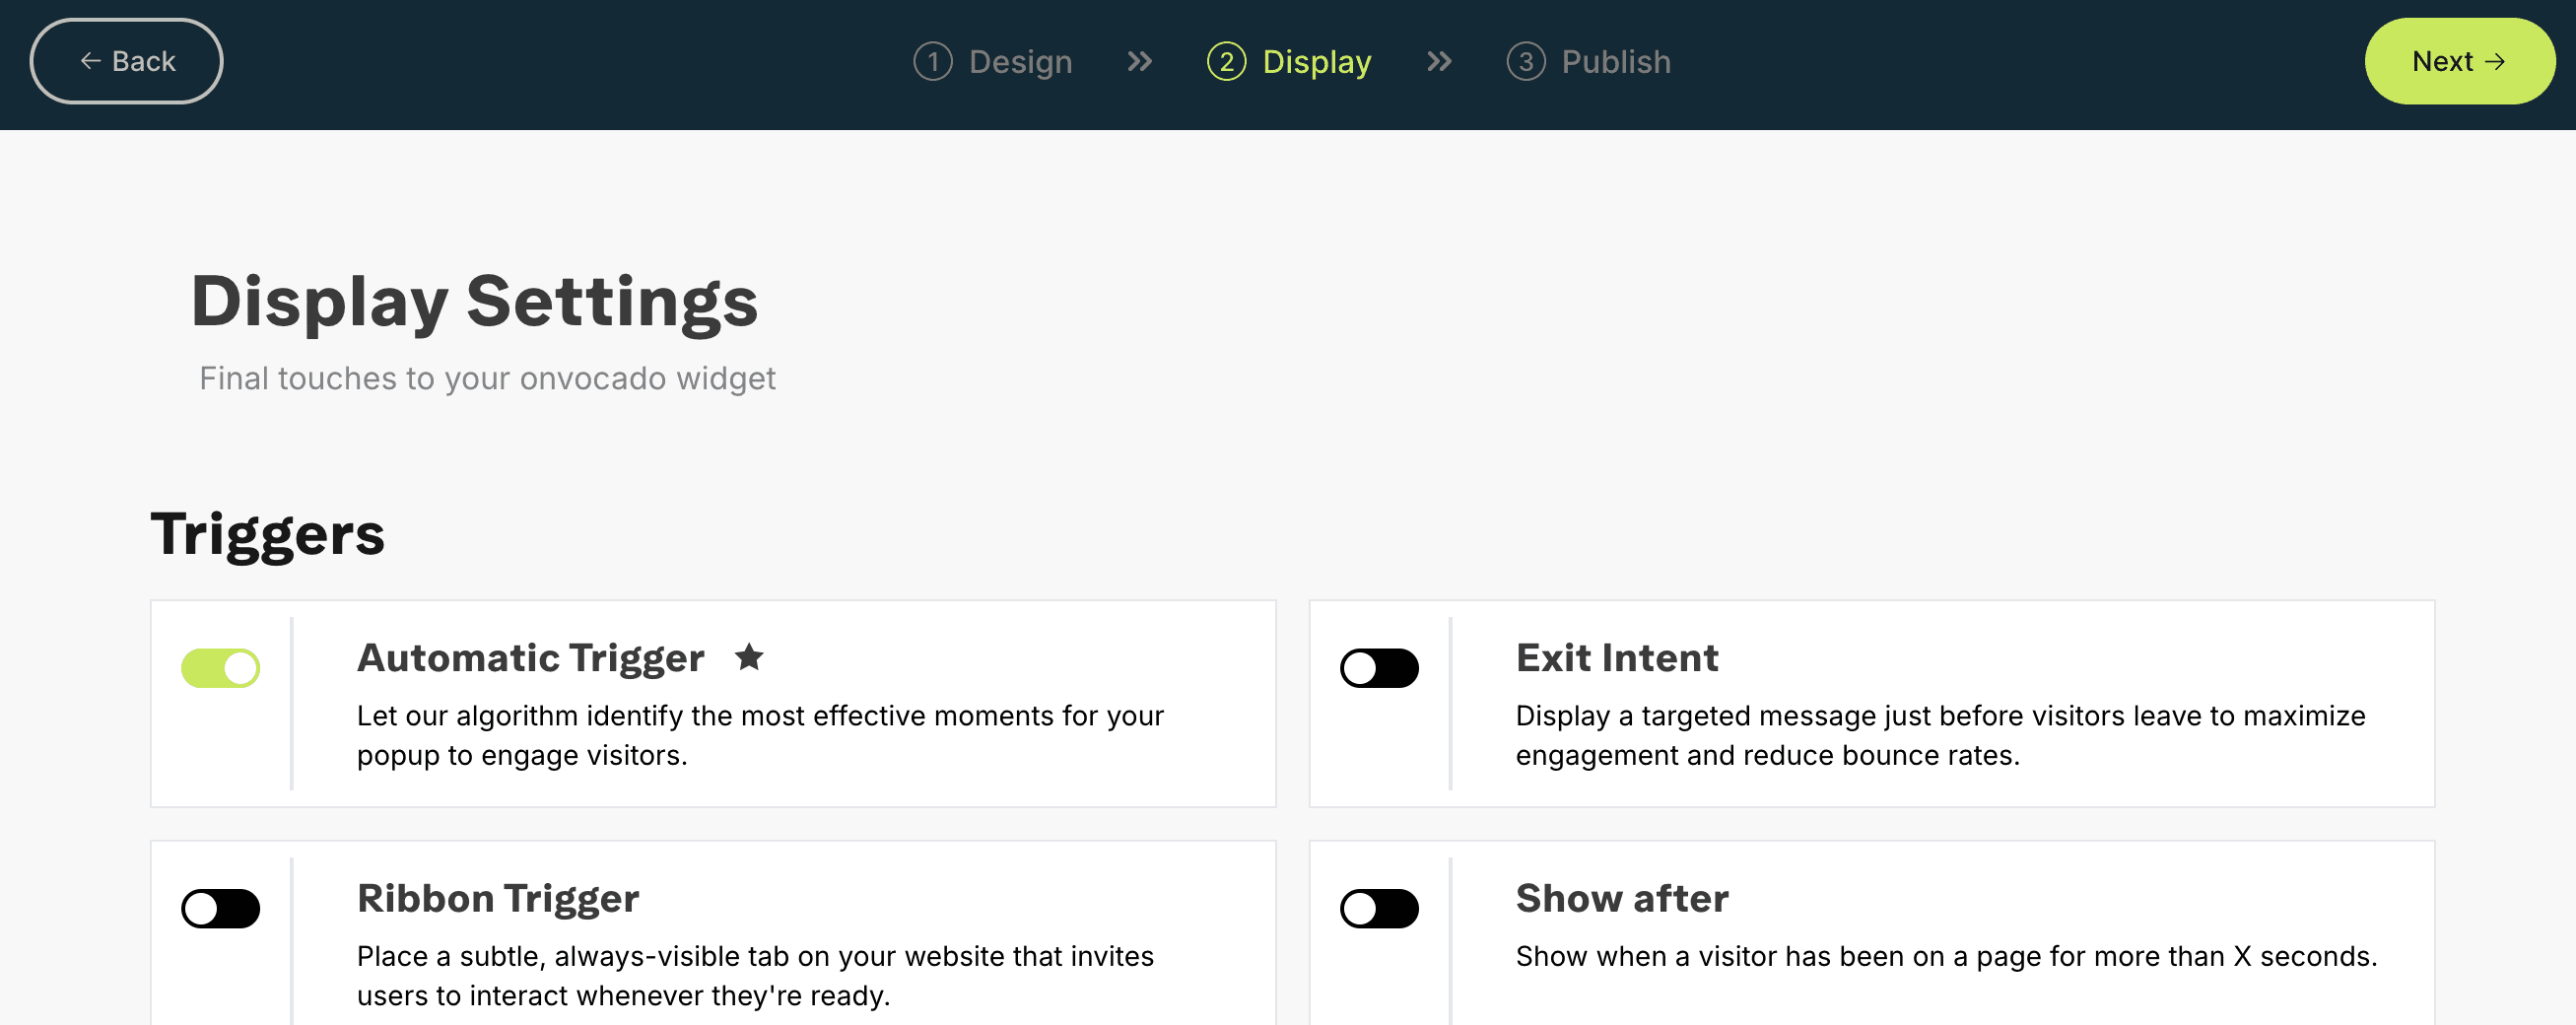
When you’re finished, click Next.
Step 3 – Set Up Integrations & Publish
Now you’re in the Publish section of your campaign. Here you can change the website, schedule your campaign, or add integrations. 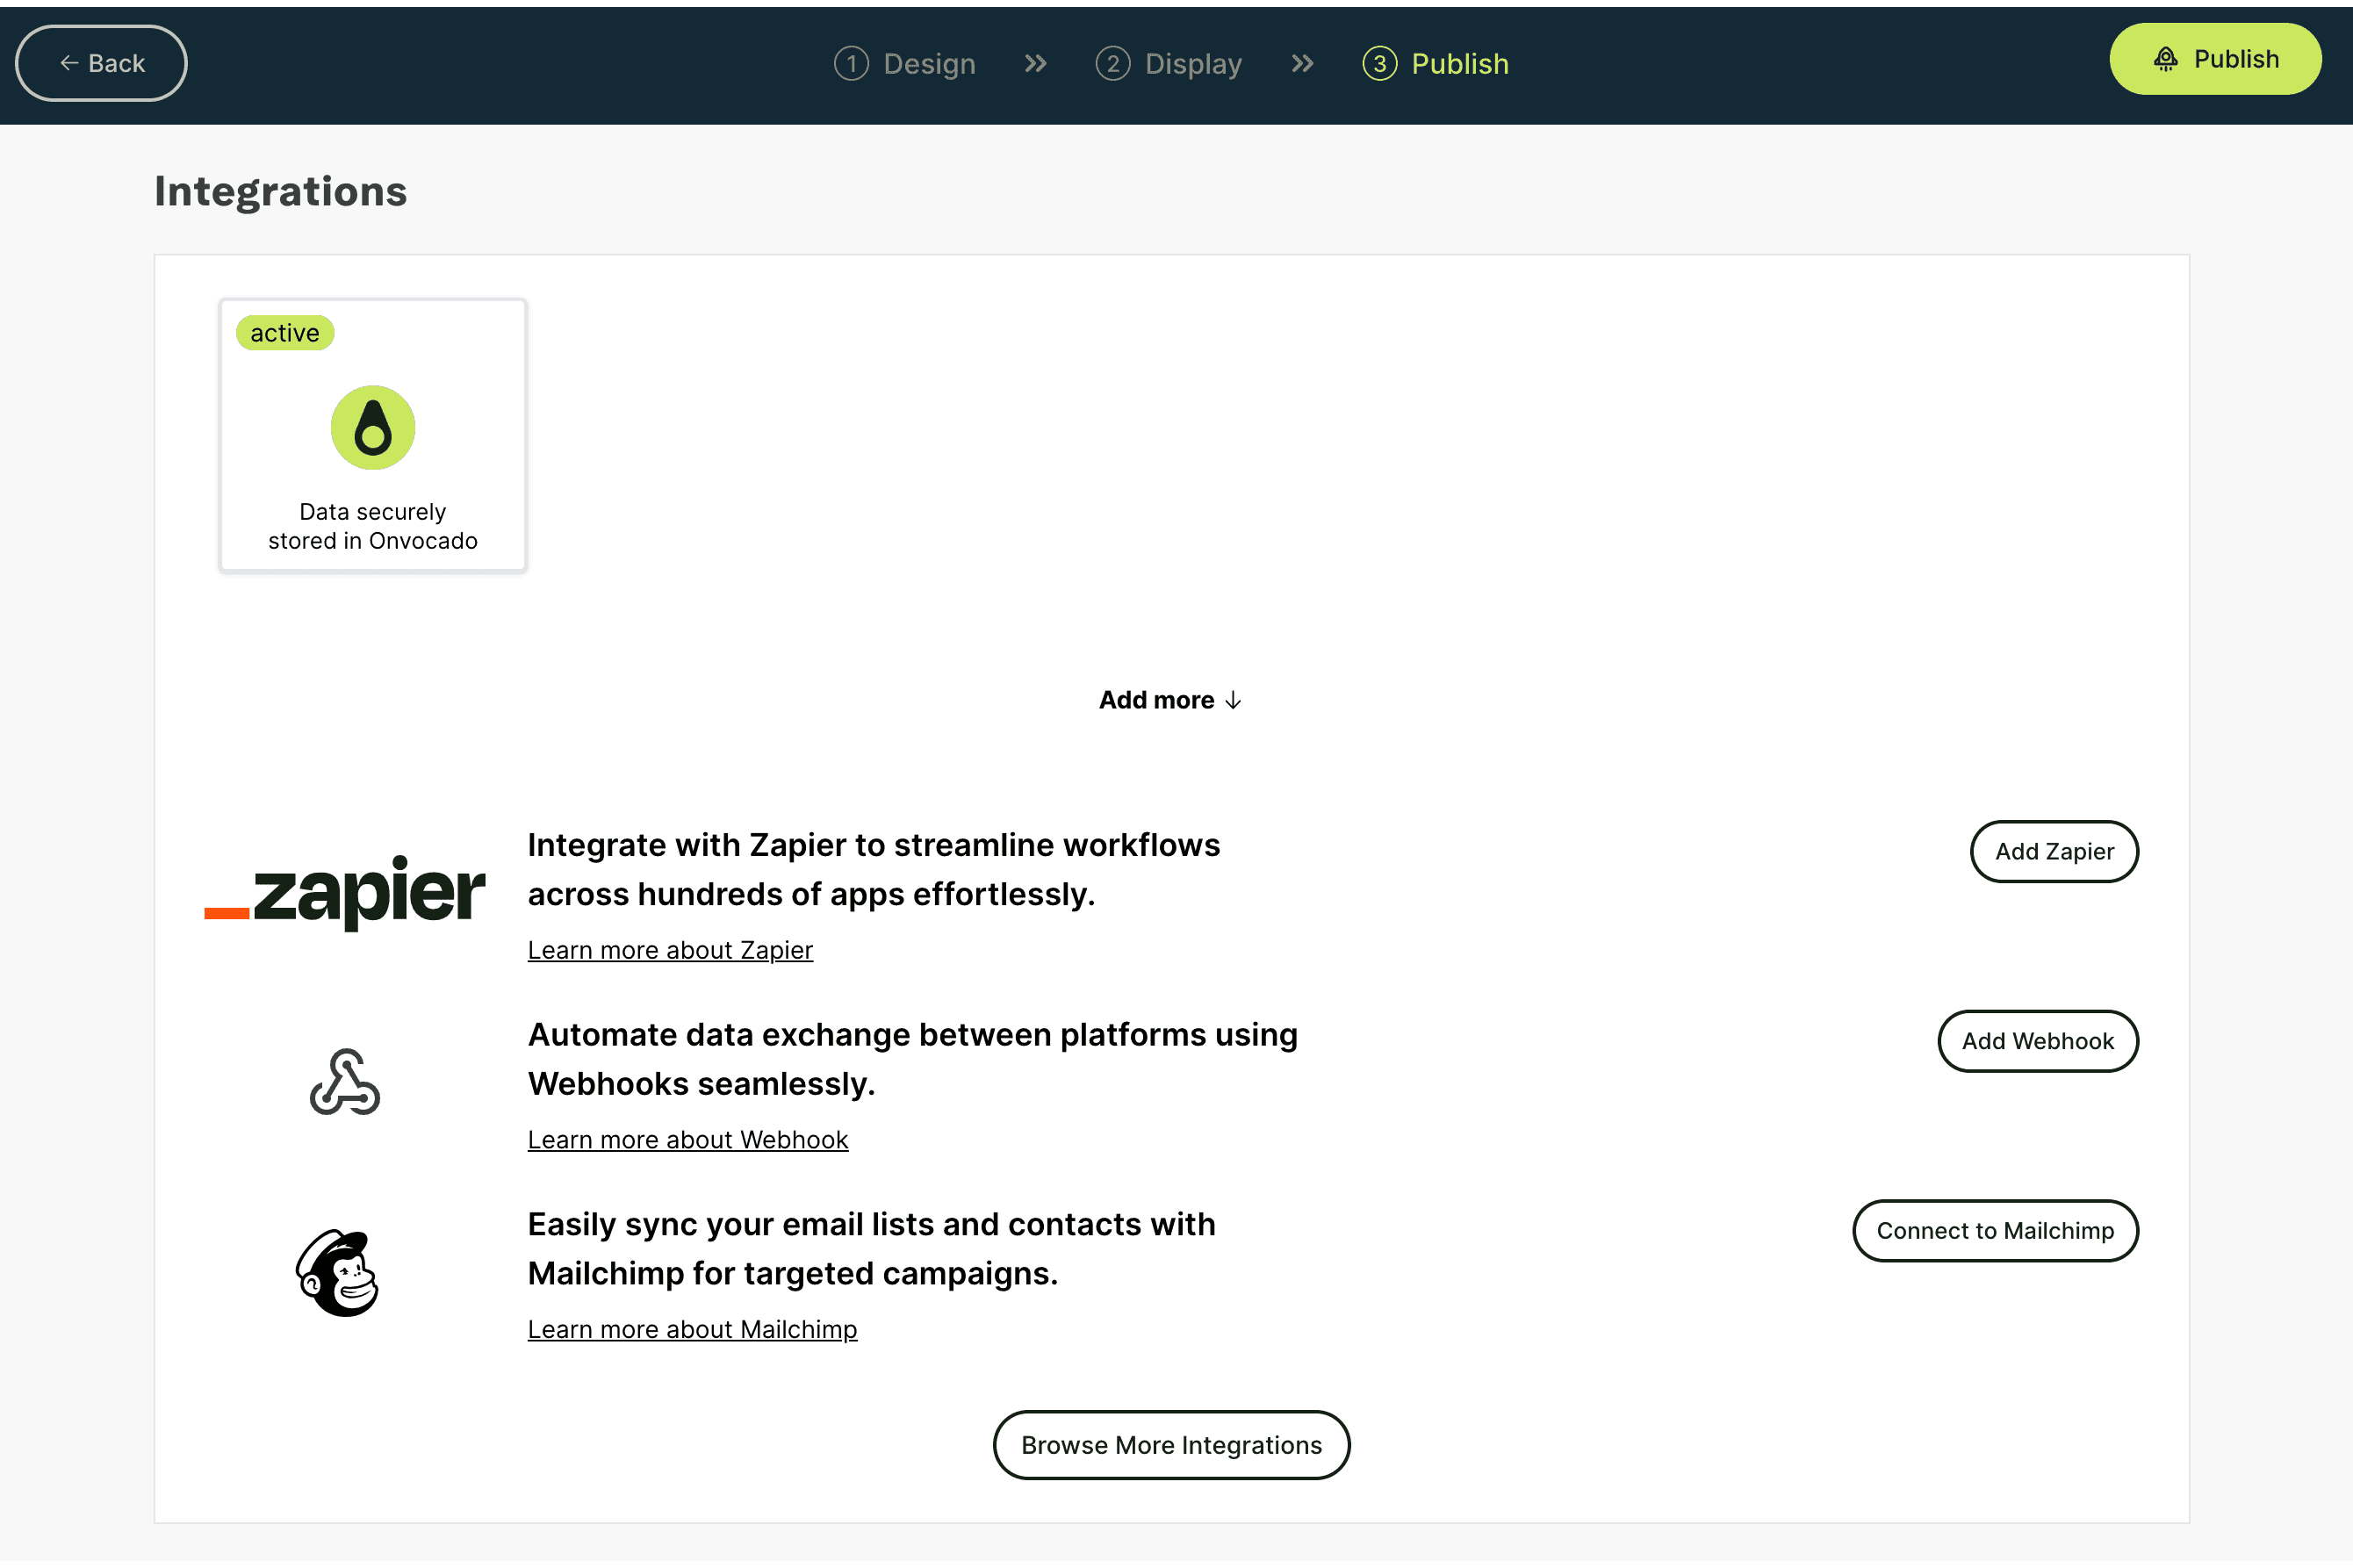
If everything looks right, click on the Publish button, then press Confirm in the confirmation module. Congratulations—your campaign is now live!
Part 3 – Measure Onvocado’s Impact
Understanding the return on your investment is key.
- Dashboard Insights:
Head to the Analytics Dashboard to review real-time engagement metrics, monitor visitor responses, track conversions, and see how users interact with your Onvocado pop-ups.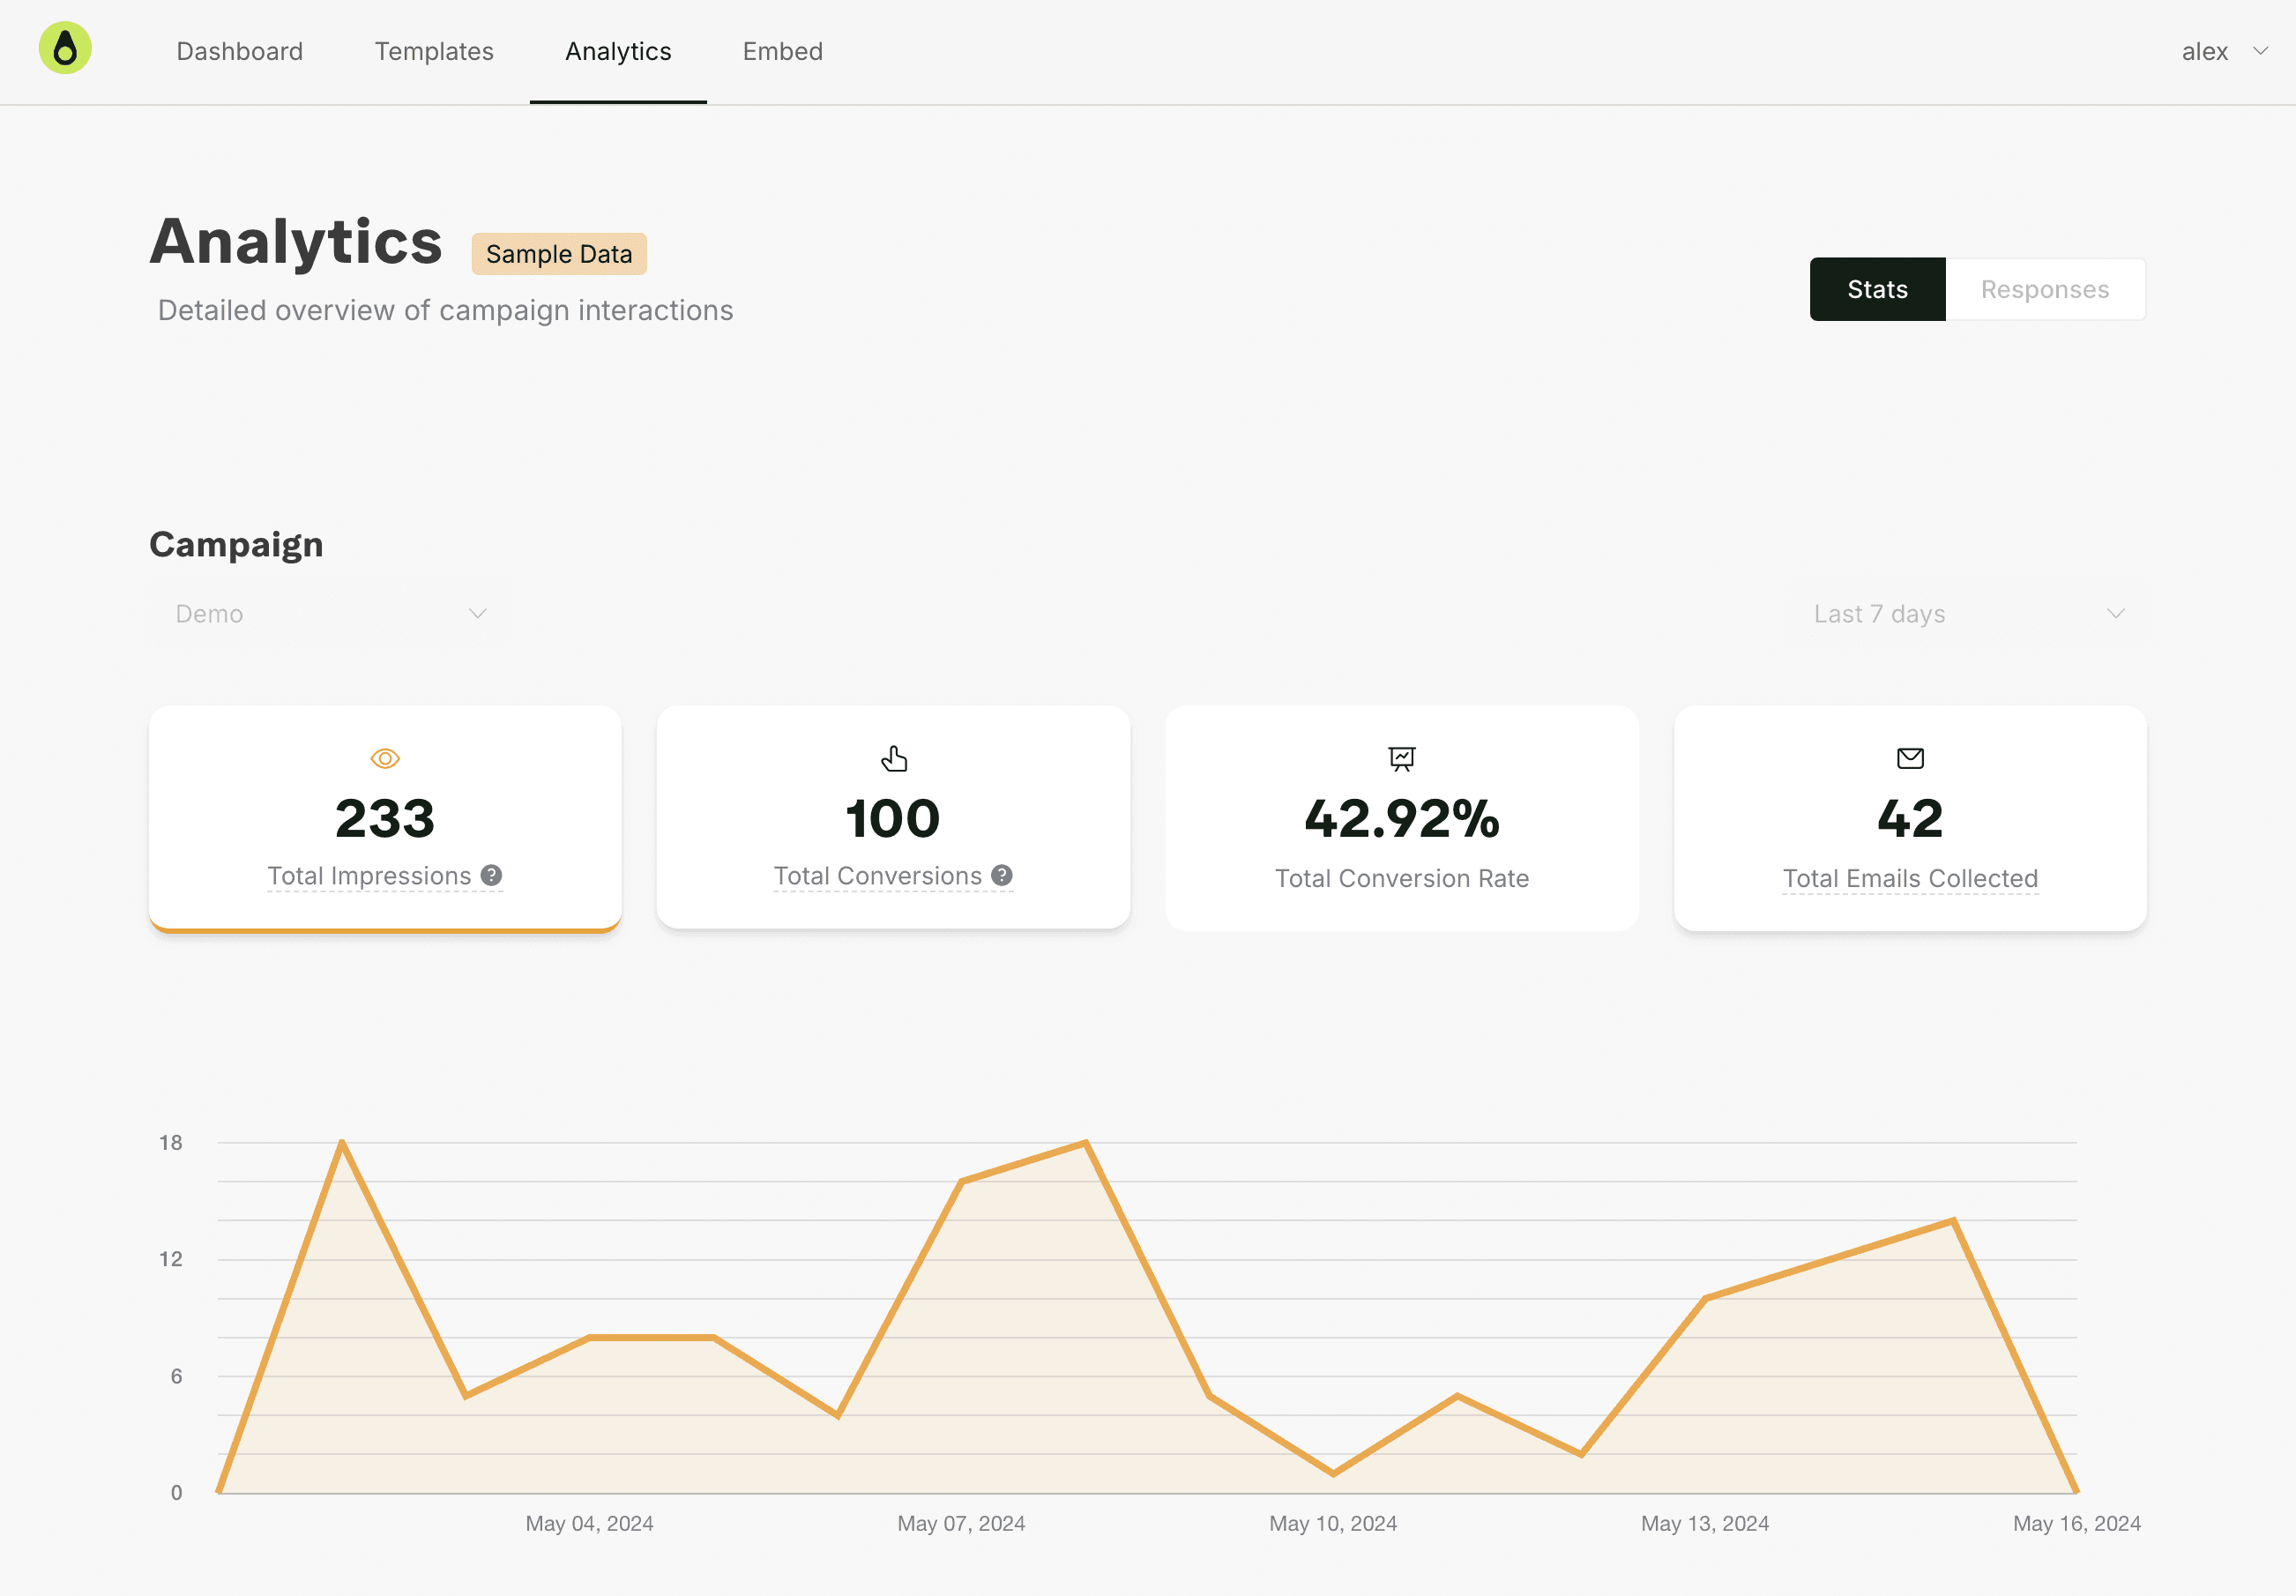
- Data-Driven Optimization:
Use these insights to fine-tune your design and settings, ensuring every visitor interaction is optimized for maximum impact.
Part 4 – Advanced Features
Elevate your engagement strategy with these advanced Onvocado tools:
- Multi-Step Flows:
Design guided funnels that nurture leads through personalized, multi-stage interactions. - A/B Testing:
Set up A/B tests to determine which widgets resonate best with your audience, empowering you to make data-informed decisions. - Geo-Targeting:
Customize your messaging based on visitor location for a more relevant and engaging user experience.
More Resources
Congrats, you’re now on your way to becoming an Onvocado pro! For further assistance:
- Visit our Help Center:
Browse articles and FAQs for additional support. - Contact Support:
Have questions or need a hand? Reach out to us at hello@onvocado.com. - Join our Community:
Connect with other Onvocado users, share tips, and discover new ways to maximize your engagement strategy in our Facebook Group.
Happy engaging, and here’s to more conversions and deeper customer connections with Onvocado!